Anonymous Focaccia
Summer flings, Focaccia di Semola
I used to garden. I’d start seeds in winter, load the cold frame in March, and plant peas in early April. By May we’d have raised beds full of seedlings: lettuce, bull’s blood beets, early spinach, kale, and chard. But with limited time in recent years my ambitious starts have had weedy endings. So this year I signed up for a CSA.
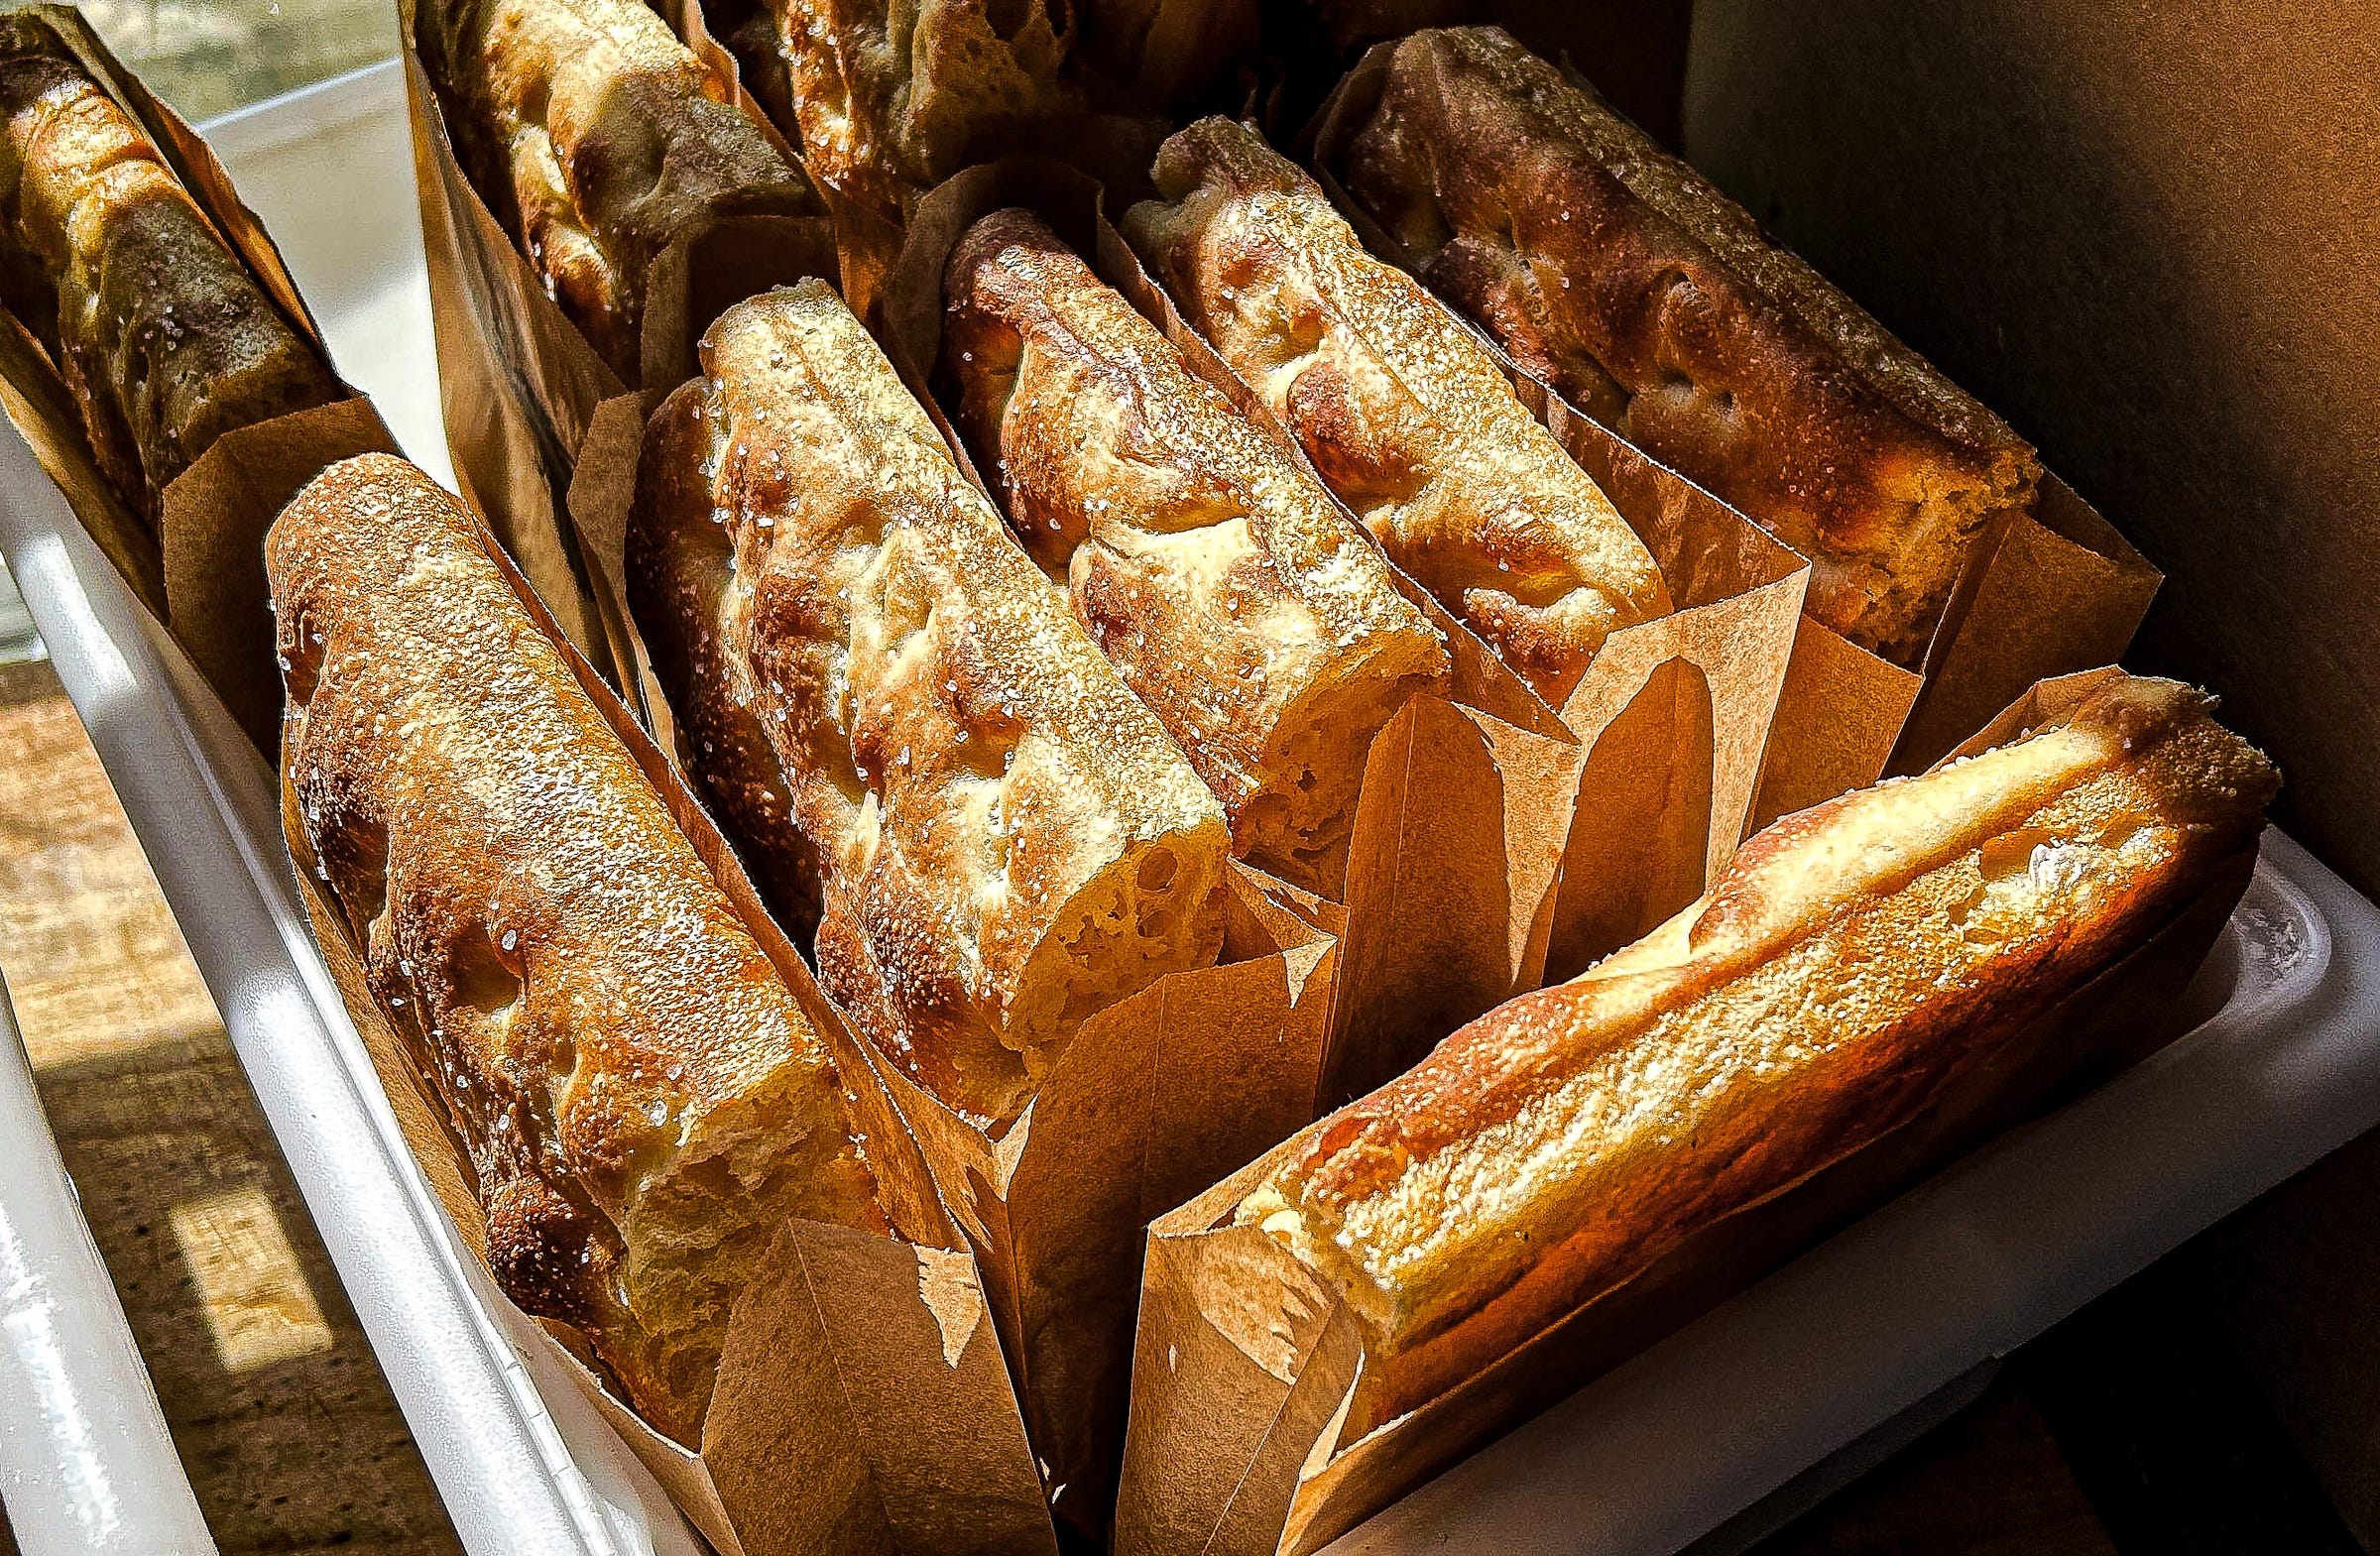
In Community Supported Agriculture (CSA), members buy shares in winter and receive the value of those shares back as a weekly box of produce from May through October. At our CSA, organic vegetables are distributed twice a week at the farmstand where shareholders can also purchase things like milk, cheese, honey, maple syrup, meat, or even baked goods, all produced on the farm or not too far away.
Rather than buying my shares upfront I struck a deal with the farmer (my dear friend Chuck) to pay for my share through an exchange: bread for brassicas. You get the arrangement.
I wrote a mixing, shaping, and baking schedule that didn’t conflict with my 9-to-5 life, bought a used fridge for $75 (for cold-fermenting loaves and doughs), ordered bags, picked up flour, and got a small grain mill. I brought a table up from the basement and used furniture clamps and bread boards to make a surface for shaping, and rearranged the dining room. With a small deck oven already in place and a couple extra dough tubs I was ready to go. Almost.
I could not do this alone. I needed a partner who, with some training, would be able to handle weigh-outs, mix doughs, bag bread, deliver, and essentially take over as much as possible. This candidate shouldn’t mind early mornings and a work environment that comes with its own occasionally cranky, quality-obsessed baker. While I initially thought one of my kids could do it, it became clear that my wife, Julie, was the best match. For over 30 years she has watched and supported me without fail. Highs, lows, career changes, and all, the job was hers without contest (and yes, she would grow to shape perfect challah, too). And so, a micro bakery was born. We called it Anonymous Bakers. No names, just bread.
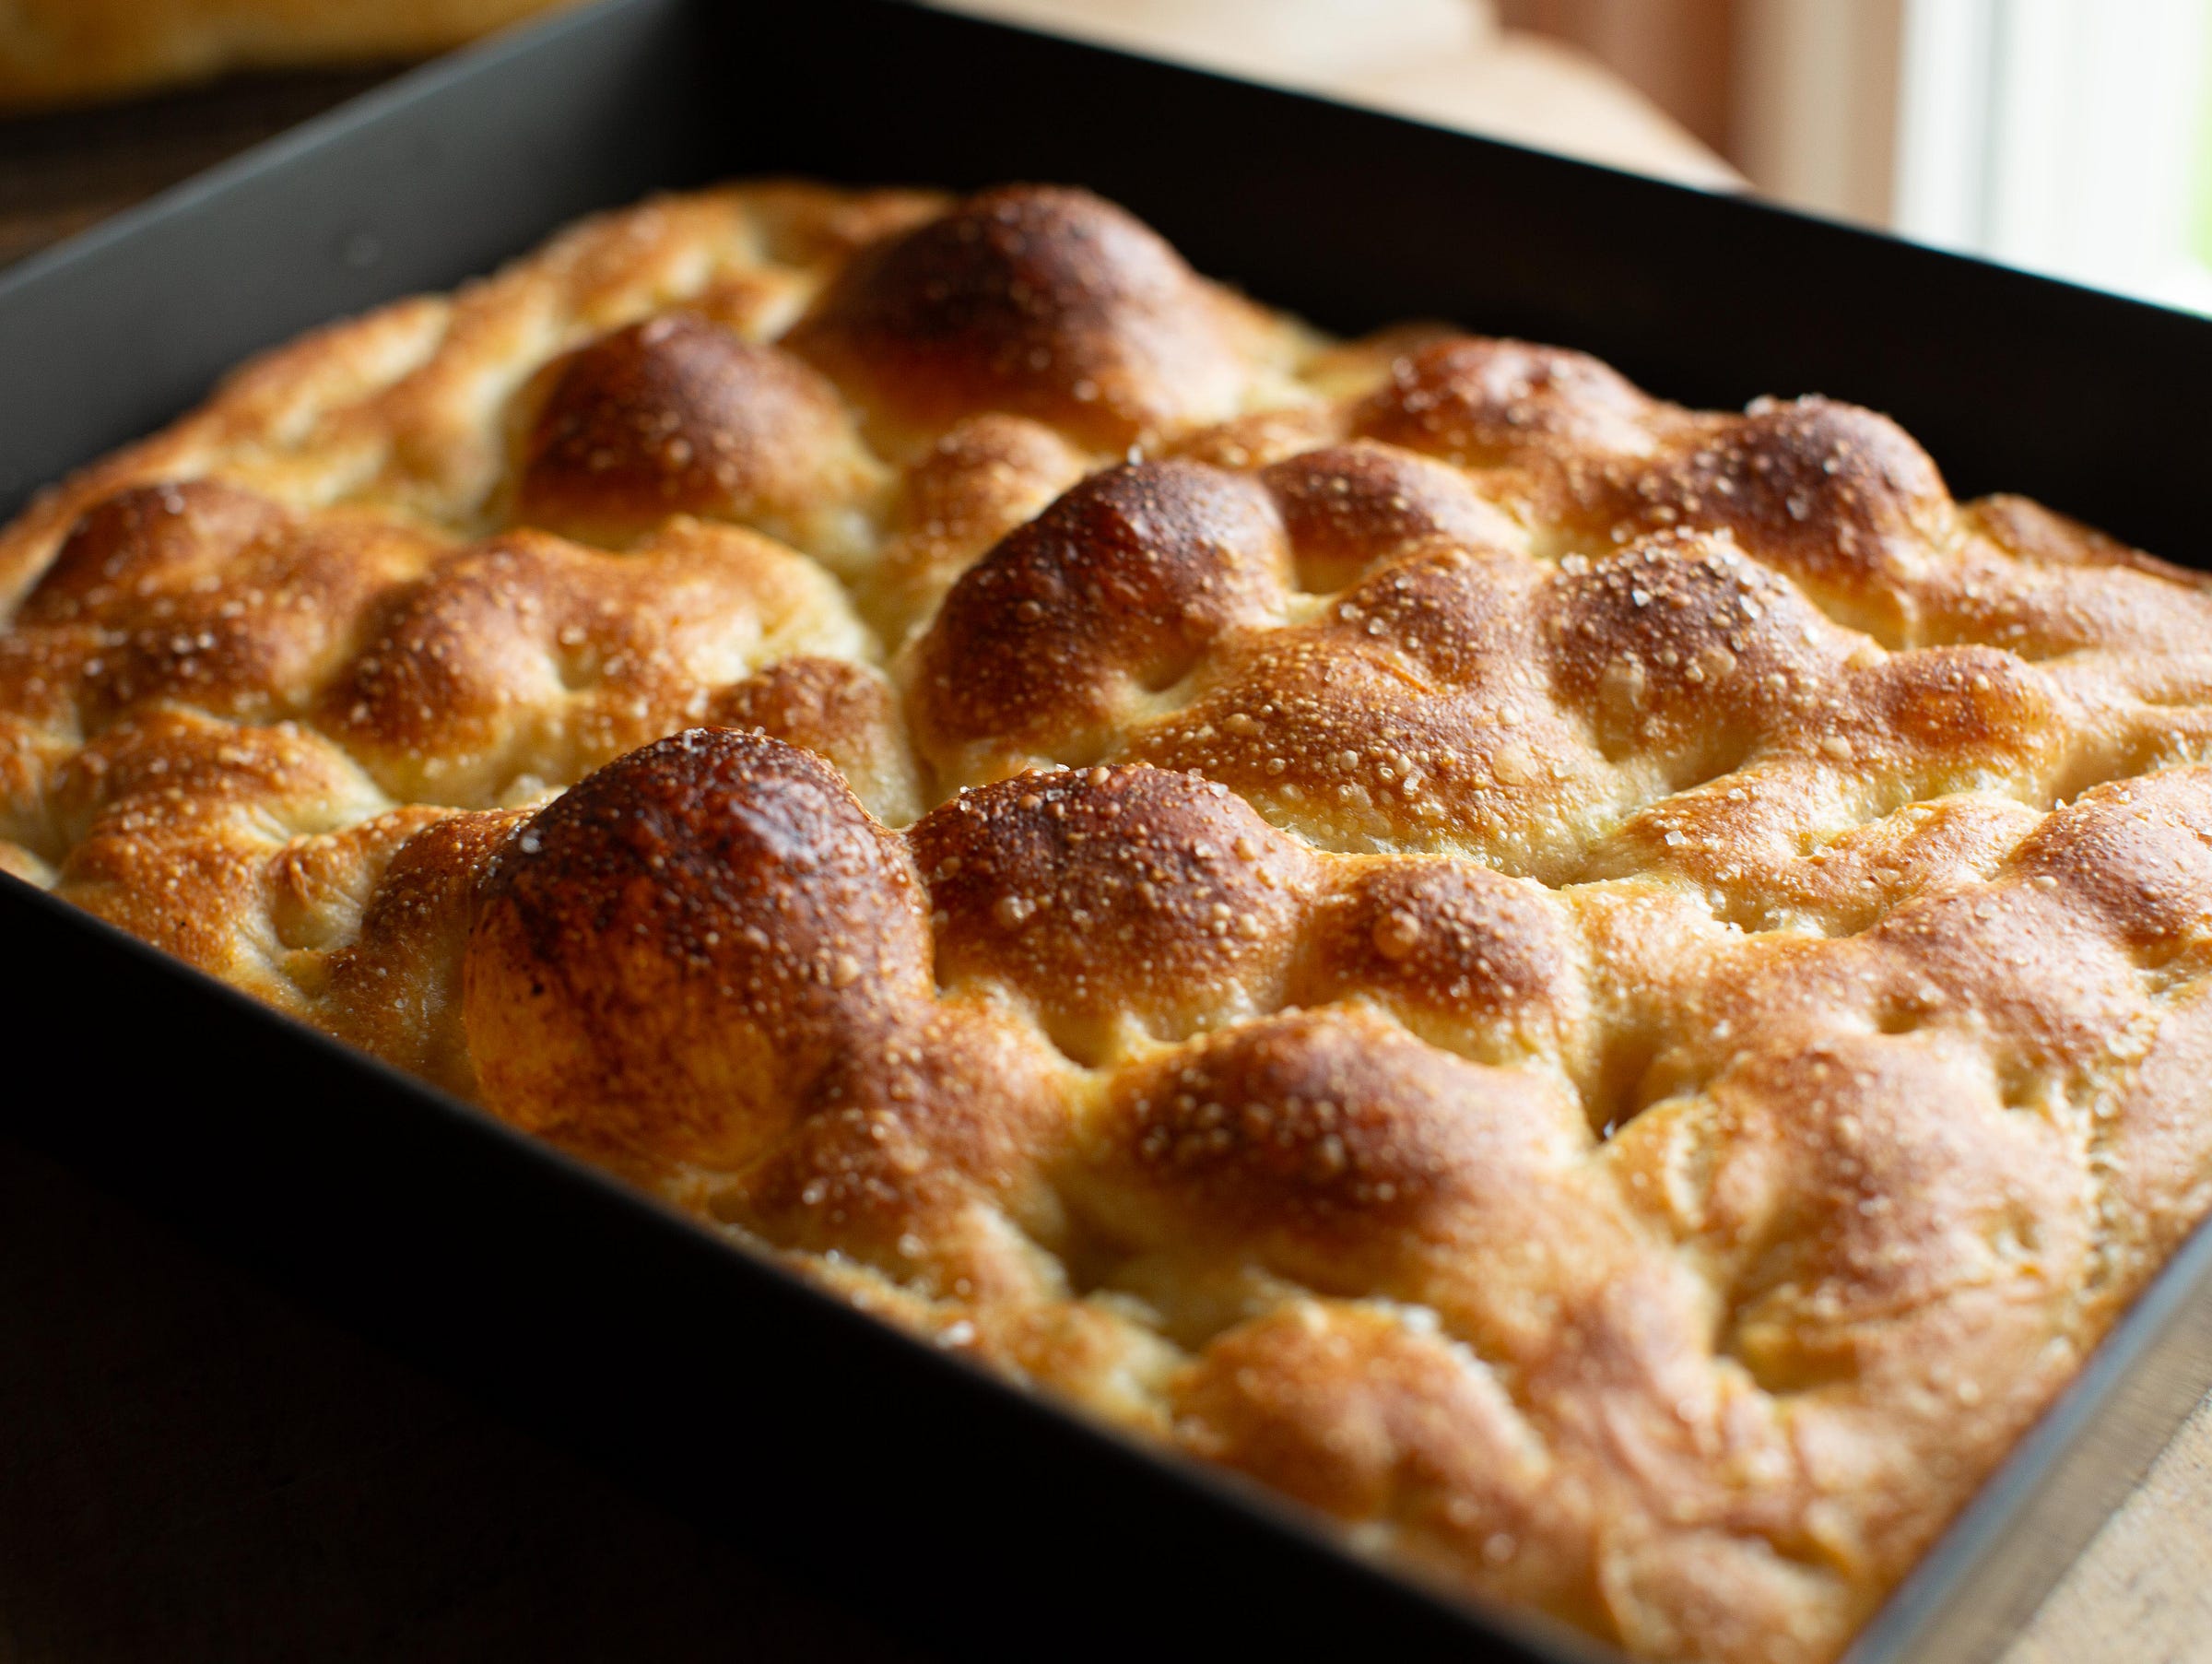
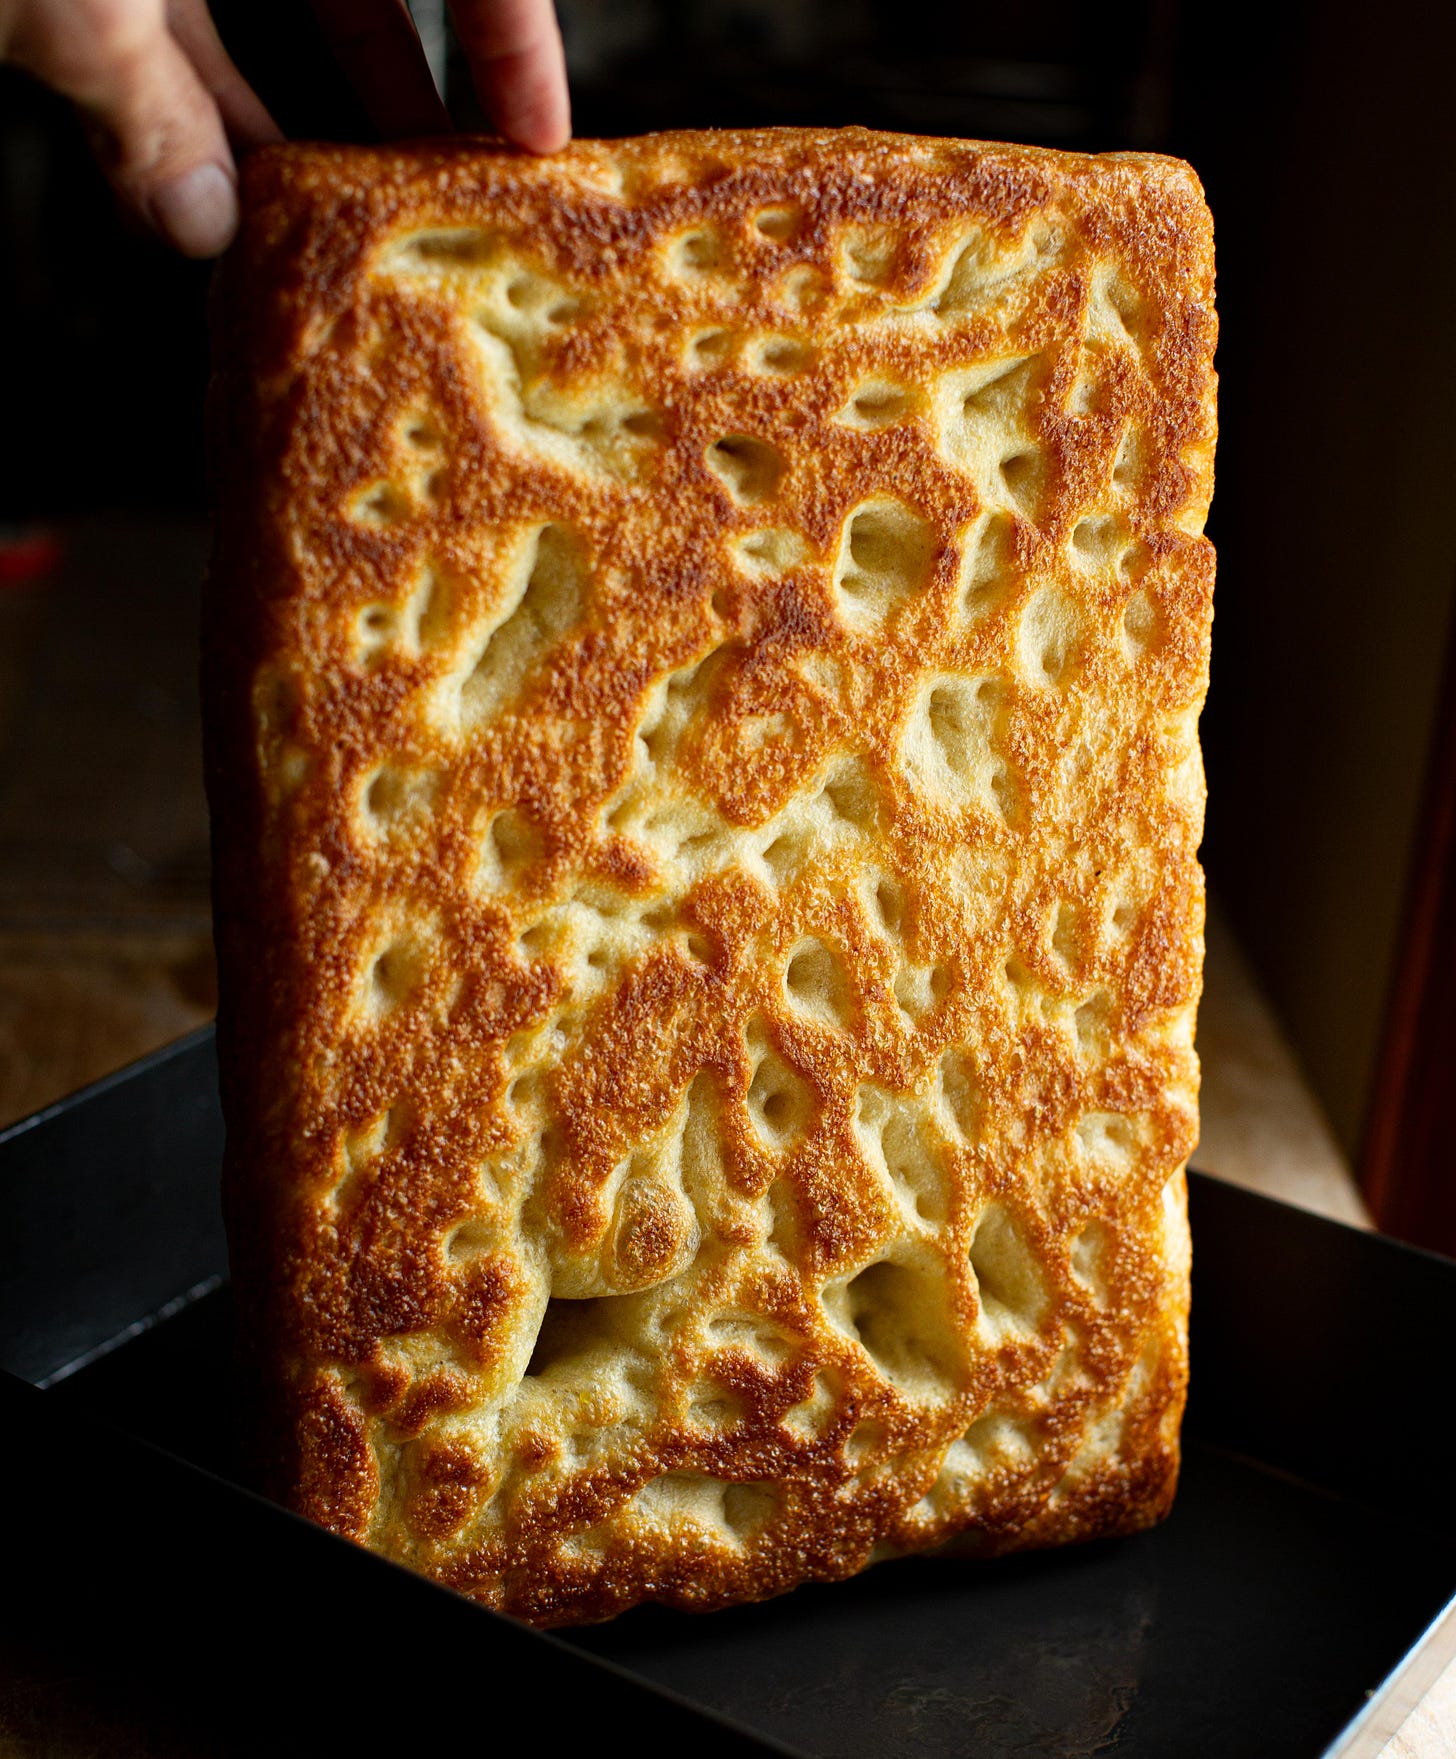
On our two weekly delivery days, the thing that always went first was the focaccia. Rather than chase an open crumb with large bubbles (and the rubbery quality that often accompanies that structure), I went in the opposite direction: crisp crust, tender interior, and a soft crumb, yellow-hued with durum semolina. I used bright green olive oil in the dough (and in the pan, and on top of the dough), and finished it before baking with coarse, crunchy salt. A square of that focaccia was perfect for slicing open to layer with farm tomatoes and mayonnaise, perfect for slathering with goat cheese and local preserves, and perfect for inhaling plain with coffee.
When late August arrived it was time to shutter Anonymous. We’d only intended it to be a summer fling — our kids needed to pack for college and we had school year rhythms to return to. As Julie prepared to deliver the last bake, I stacked bannetons, cleaned my tools, took off my apron, and paused, thinking. I will miss some of this.
Early mornings in a bakery are special. The silence, the angle of the sun as it chops trees with dawn light. Burnished loaves crackling in song, a vocal finale to days of silent effort. And the physicality of it all — the way that movement between the bench and oven becomes a dance, part ballet, part rugby. And the small things, too. Hopping down the back steps with my headlamp on to open the chicken coop and grab cold-fermented loaves from the garage while the oven warmed up. And watching sleepy faces come downstairs, chasing the source of the aromas that reached their bedrooms. Let’s relive a bit of that.
A brief note about semolina and a sample schedule, then the recipe.
Semolina, meaning literally, “half-milled,” is a coarse-milled product of durum wheat with the consistency of fine-grained sand. Perfect for dusting a pizza peel, I don’t often use it in baked goods, preferring durum flour instead. But, durum flour isn’t as readily available and, the coarser semolina actually makes the dough more tender. Note that absorption, the quantity of water that a given grain or milling will hold, varies by brand. I’m using the King Arthur semolina in this recipe but use whatever you can get your hands on and adjust as necessary. This is not a fussy dough.
On day one you’ll mix the dough then let it rest, folding occasionally for 2 to 3 hours. On day two, 3 or 4 hours before you want focaccia, pull the dough from the fridge and place into an oiled pan where it will have a long, slow rise before baking.
A sample schedule:
7:30 pm: Mix, fold occasionally.
9:30 pm or 10:30: Place in the fridge.
2:00 pm (subsequent day): Pull the dough at 2:00 pm and let it rise and warm in a pan until 5:00 or 6:00 pm. Drizzle with olive oil, garnish with salt, then bake.
Anonymous Focaccia (Focaccia di Semola)
Bread Flour, 352g
Semolina (Durum), 88g
Salt, fine, 10g
Yeast, dry instant, 2g
Water*, 326g
Olive oil, extra-virgin (best!), 22g
Olive oil, for greasing the pan and garnishing
*Water should be warm in cool months (105°F to 110°F) and cooler in warm months (75°F to 85°F).
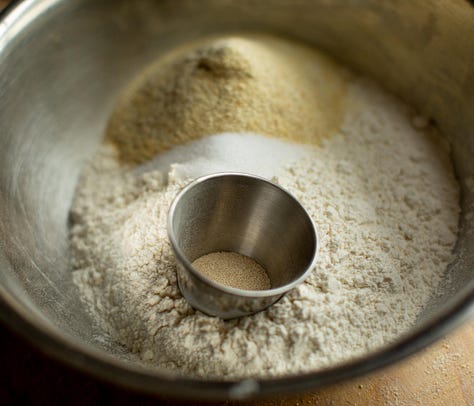
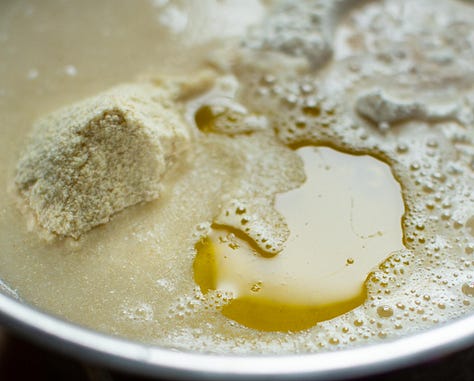
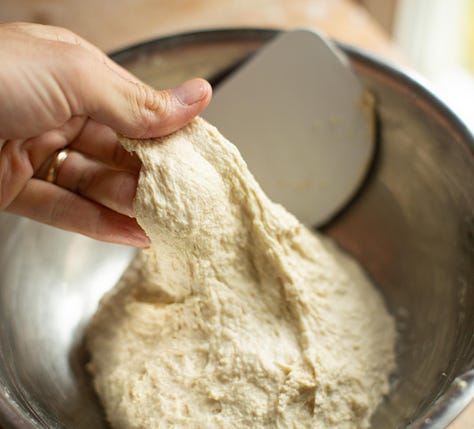
Mix:
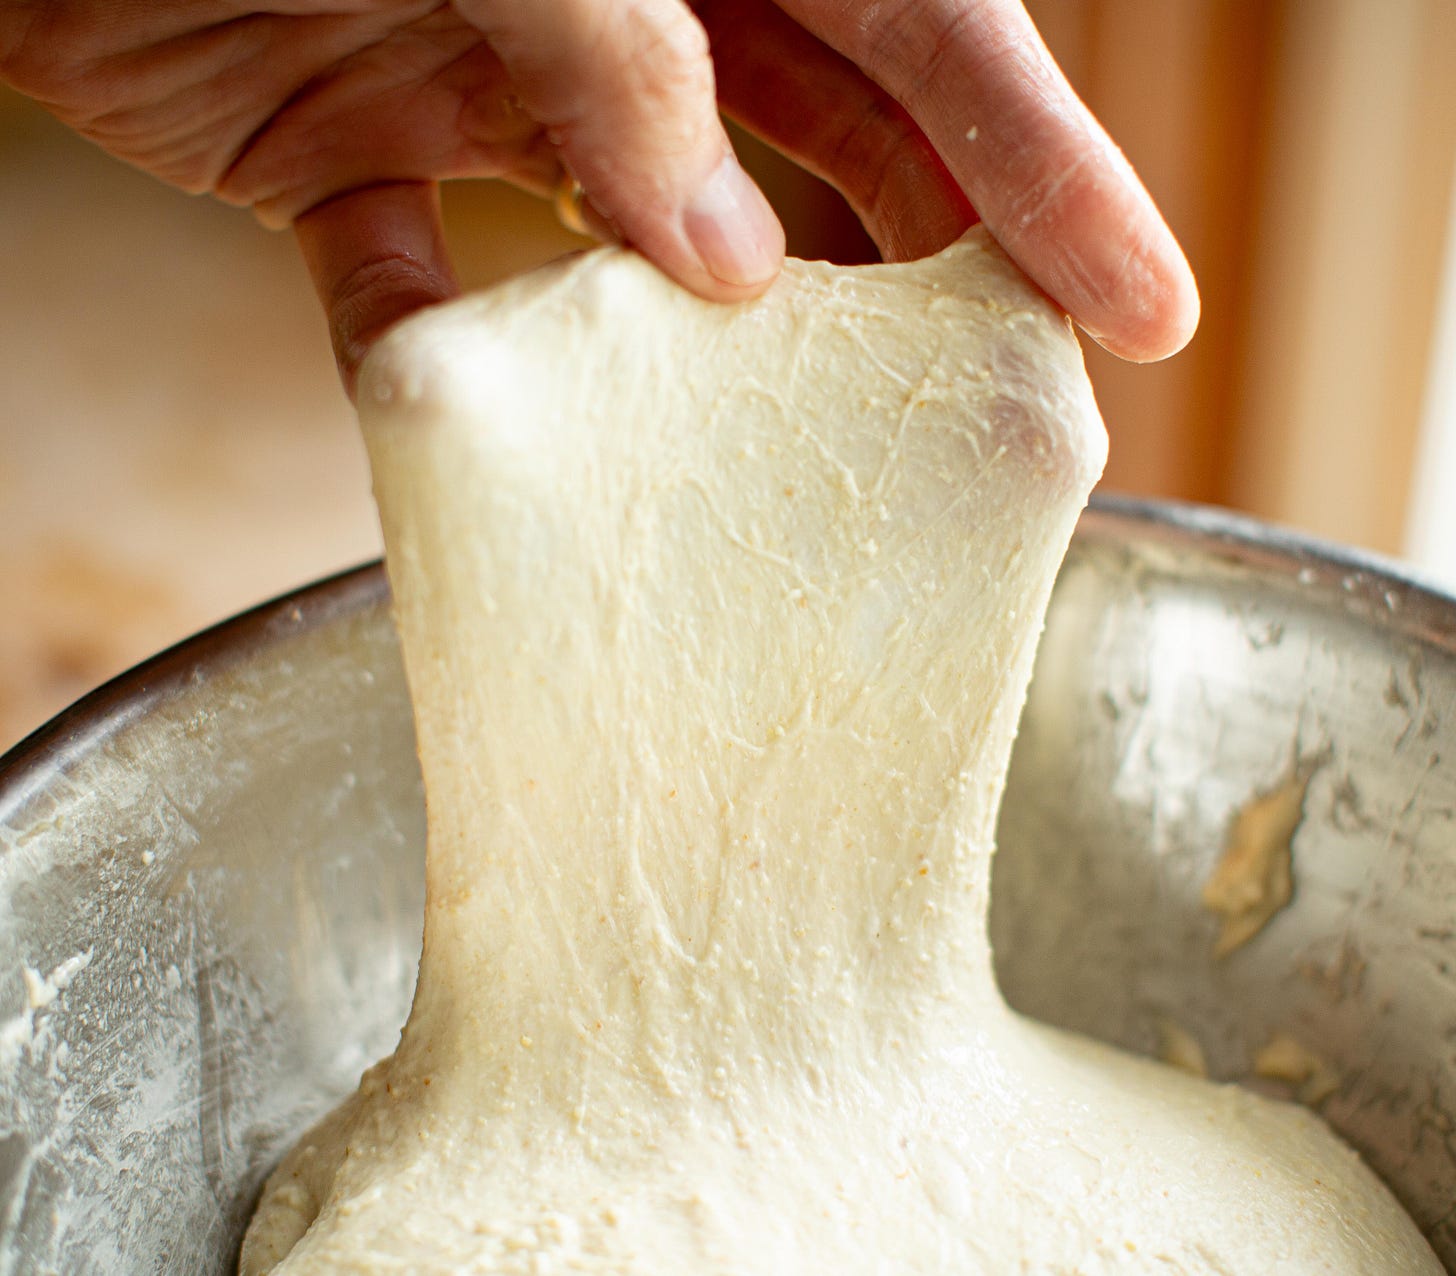
Combine all ingredients, stir briefly, then press and fold with a wet hand until smooth, 1 to 2 minutes.
Bulk fermentation:
The dough will rise for 2 to 3 hours at room temperature. At 20, 40, and 60 minutes, stretch, press, and fold until it resists stretching and will tear if worked any further. These are strong folds. (Don’t fret too much about the timing — the folds are flexible — just make sure to get at least three or even four completed before the dough is chilled.)
After the folds, let the dough rest. Again, no need for a protractor here, just let it rise until puffy, 2 to 3 hours. After the rest, fold one final time then place in a generously oiled container (I like my trusty 6 quart with a lid), and chill for 12 to 24 (or as long as 36) hours.
After the cold rest the dough will be puffy and, depending on activity and length of rise, sometimes it will have large surface bubbles. As gently as possible—being careful not to fold, compress, de-gas or otherwise disturb the airy mass (pretend it’s sleeping), invert the dough into a 9” by 13” pan, oiled with 1 ½ T of your best quality olive oil. (In some of the pictures you’ll see me using the Detroit pan from Lloyd, a great dark-anodized option.) Flip the dough once to coat then place in a warm spot, covered, for one hour. (In cold months I always proof things in the microwave with a bowl of warm water.)
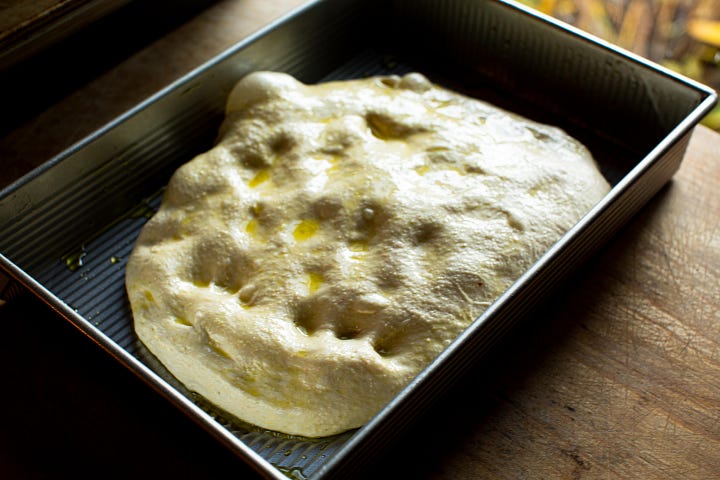
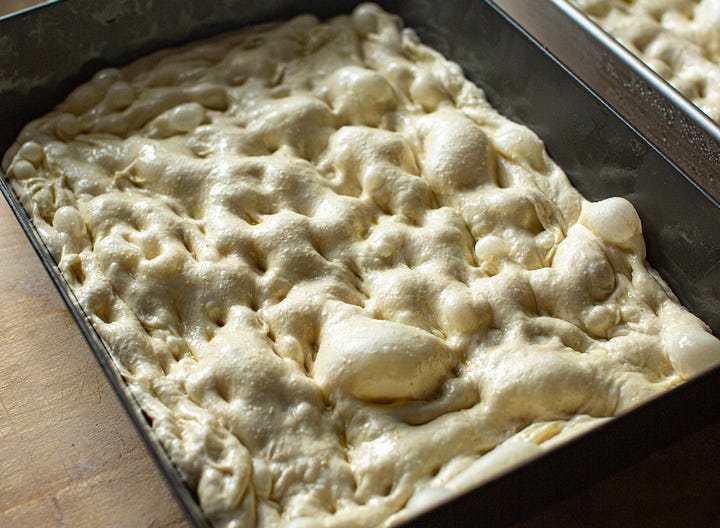
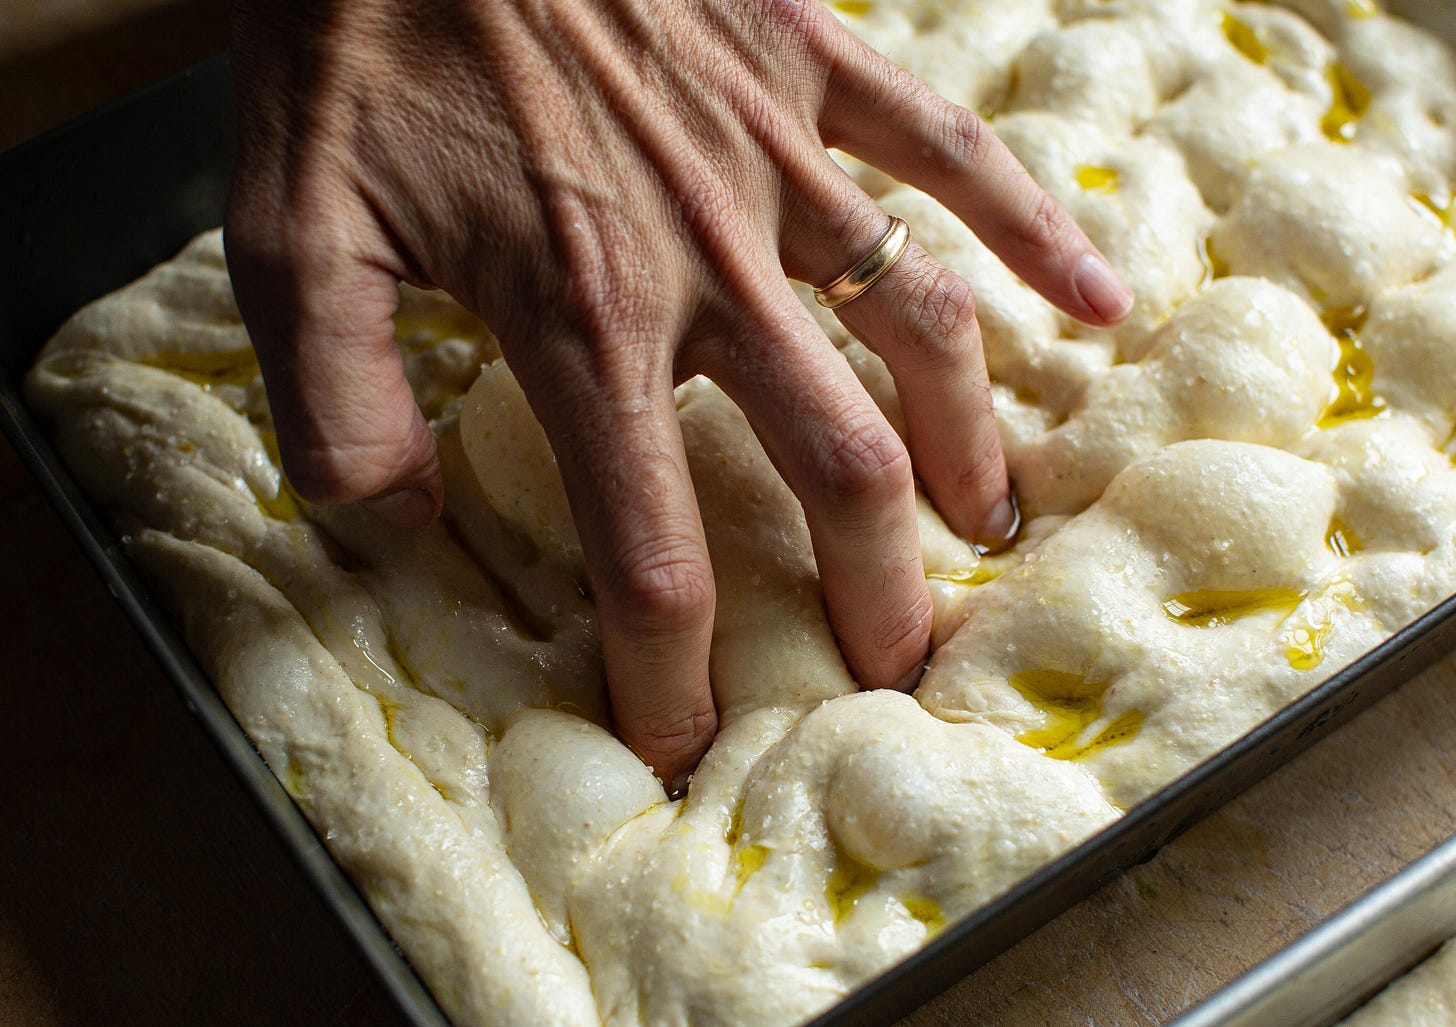
After the hour rest, gently dimple and stretch the dough so that it evenly spreads into the pan. If it resists at the corners, hold the corners and gently pull to make a rectangle shape. If the dough doesn’t quite want to fill the pan, wait a few minutes then return and repeat as necessary. After stretching, proof for an additional two to three hours. Towards the end of proofing, preheat your oven to 500°F with a baking stone set on a middle rack and a cast iron pan for steam.
After the rest, right before baking, you may very gently dimple the dough in a couple spots. But be aware, aggressive dimpling will de-gas and make for a dense structure, so avoid any rough treatment. (If I dimple I literally only press into the dough in 8 or 12 spots.) Garnish with a generous drizzle of olive oil and sprinkle liberally with coarse salt.
Place the pan onto the preheated stone, add water for steam to the preheated cast iron pan, and bake for 20 to 26 minutes, checking the bottom after 15 minutes to make sure it isn’t taking on too much color. At the end of baking the bottom should be deeply golden and the top should range from golden to mahogany. Brush afterwards with additional olive oil for extra shine, if desired.
The Anonymous Sandwich
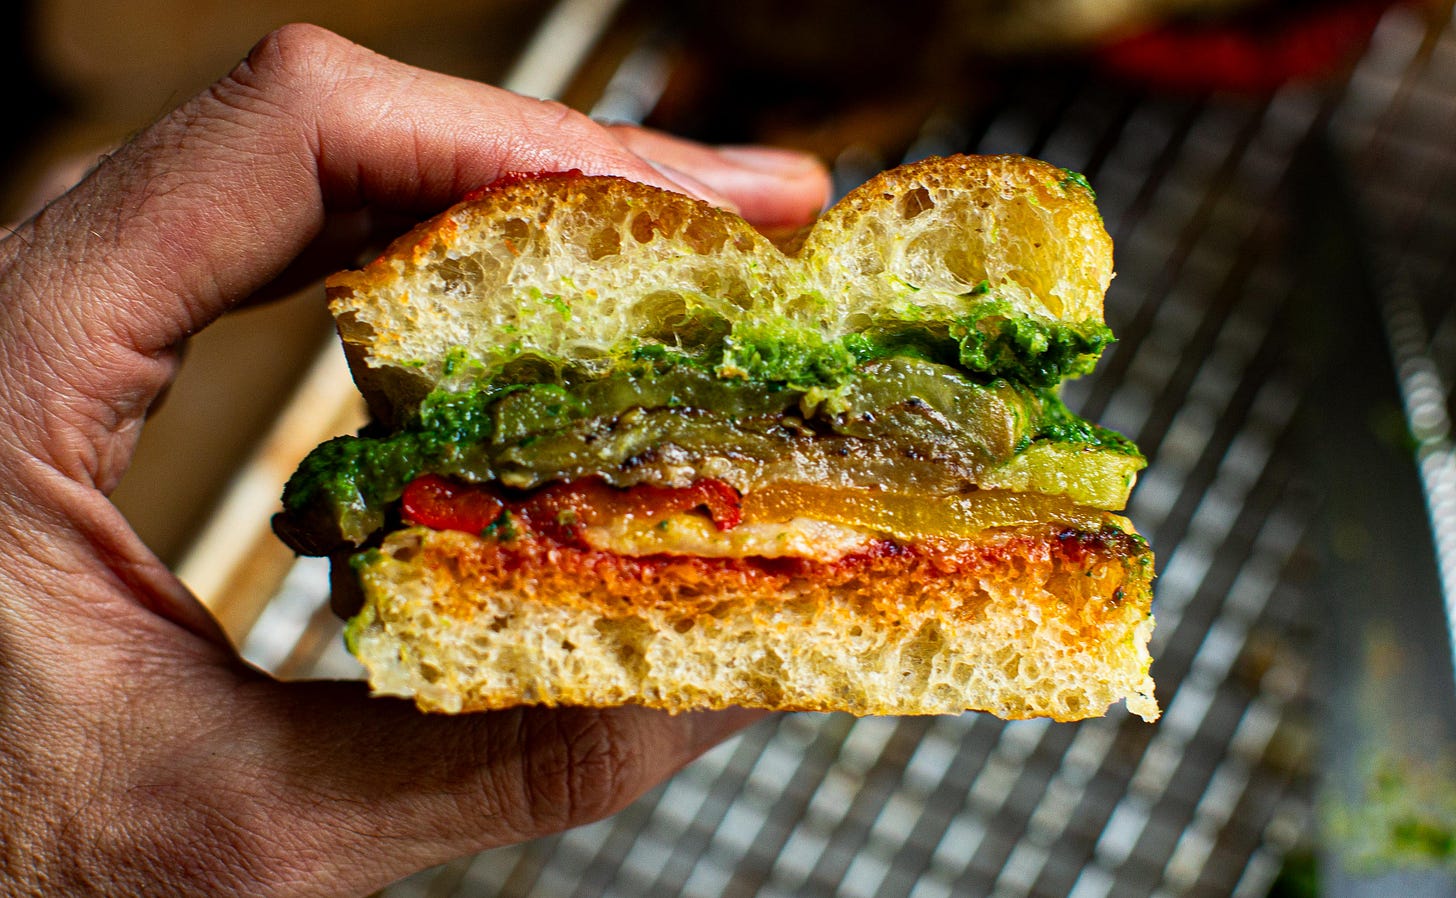
In our CSA box this week there were peppers and eggplant as well as garlic and lots of herbs in the pick-your-own beds. Thinking of a delicious sandwich, here’s what I did.
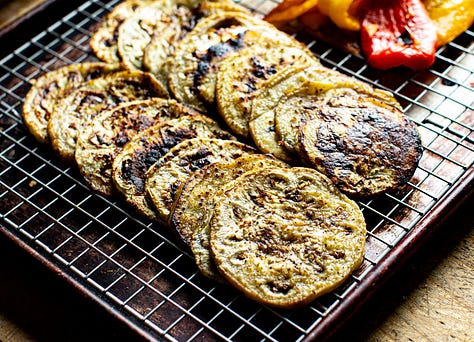
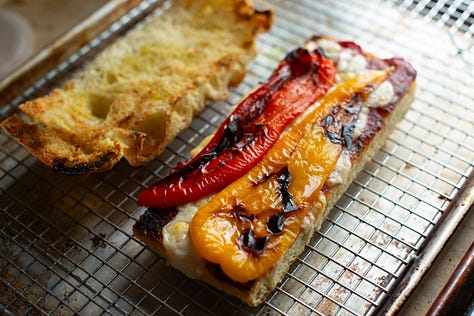
Peel and slice the eggplant, into 1/4” slices. Place on an oiled griddle, salt, then cook until dark in spots. Cut the peppers and broil until blackened. Cool, then peel the skins.
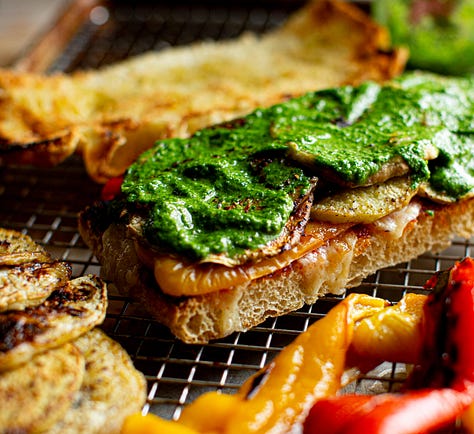
Make a quick chimichurri by blending parsley, red wine vinegar, olive oil, salt, and half of a jalapeño.
Mix tomato paste with olive oil and spread onto a split section of the focaccia. Add cheese and broil until melted. Brush the plain half with olive oil and broil it as well.
Assemble the sandwich. Stack the peppers and eggplant then garnish with the chimichurri.
Thanks for reading, friends. Thanks also to Posie Brien for the insightful edits and encouragement to do this. And thanks to Julie for the myriad of ways that she made Anonymous possible. And also Chuck who has inspired me beyond measure to live closer to the land and honor its bounty.
Martin (the Anonymous Baker)


Thanks so very much Martin. Your writing is like balm and is beautiful and inspiring. I hope to try this soon. I’ve had some Epic fails lately but thankfully have been able to laugh and grow a bit.
Great story! I enjoyed every word 🙂