This post may require a cup of coffee. Or two. What began with me thinking, “what if I…” with regard to some lamination techniques, has evolved into a lengthy exploration of brioche feuilletée and, more specifically, how it might be adapted to make the viral pastry sensation, the “suprême” (also known as the “New York roll”). As it turns out, it’s necessary (and probably better for you) to split the post in order to make Substack happy. So, welcome to suprêmes, part one: the dough and the bake. Part two: fillings and garnishes, will hit inboxes in a few days. Happy Spring — Martin.
Among the range of challenges facing the home baker, Mt. Lamination might be the hardest peak to bag. From a distance, all we see is beauty. Crisp layers rise to buttery heights with toasty hues that outshine flat breads, dusty boules, and even baguettes in the valleys below.
But the climb to get up there ain’t easy. Before the flag-planting, fist-pumps, and first descent of teeth, there are plenty of places to slip. Like the hazards in Candy Land, there’s Dry Dough Gulch, Butter Leak Crevasse, and Burnt Bottom Pass. You may want oxygen. At points I have to hold my breath.
I was in college the first time I made croissants. I followed a Joy of Cooking recipe that I don’t recall beyond the fact that it required a full day of walking between the counter and the fridge with a brick of dough: first fold, second fold (or was that the third fold?), and so on. What we eventually ate were hard, small, soaked in melted butter, and way too dark on the bottom. Not bad? Not good.
Fast forward a pile of years and here I am as a professional, laminating dough at home again. And you know what? It’s hard. I don’t say this to discourage you, but rather to advise the following: bring your patience, your precision, and your attention to detail. With those elements on board, I will hold up my part of the deal and offer every possible time-saving, ease-making trick I can think of, writing a recipe that gives you the highest likelihood of a view from the top. And trust me, it’s worth the effort.
These viral “suprême” croissants, also known as “New York rolls,” are credited to the talented team at Lafayette in New York City. From those beginnings their creation caught a plane to every corner of the globe and now you can find them in flavors from salted lime to yuzu cream and even ube.
But I’d never tried making them (or even eaten them), and that needed to change. So I guessed about the size of the ring molds (4” by 1.75”) and ordered them. They sat on my baking shelf for four months, kept company by a queue of other things waiting for unwritten recipes: rose petals, blue pea flower blossoms, spent grain flour, unhulled buckwheat, guava paste and so forth. Until now.
I’ve been thinking about lamination, specifically, the unique set of challenges for the home baker. Some of the difficulty relates to tools: rolling an even dough without a sheeter, proofing without temperature or humidity controls, or even simply cutting regular shapes that are the same size. Some of it relates to ingredients, mostly the plasticity or “ductility” of supermarket butters that don’t perform as well as commercially available butter “sheets.” In the process of writing this recipe, I've come to better understand the issues and also find solutions that can be applied to lamination more broadly.
Let’s talk about the dough.
While the suprêmes are traditionally made with croissant dough, for a variety of reasons I’ve decided to use laminated brioche here (also known as brioche feuilletée). While brioche has the potential to add another level of difficulty, with minor adjustments I feel like it actually works better than croissant dough. Let me explain.
Brioche is a soft, buttery dough that is best handled cold due to the high fat content. Thinking of ways to improve handling and more easily navigate the lamination process, I lowered the standard butter amount from 50% to 25% (in baker’s math). This change allows me to work with the dough at warmer temperatures while also matching butter and dough consistency (more on that, below), a benefit during lamination.
In addition to helping with dough consistency, the lower butter quantity also supports an easier mixing process. With normal (fully enriched) brioche, I’d mix a base dough to full gluten development then slowly add in the butter (as I do, here). After mixing, the dough (which is soft and often warm) needs to fully chill before shaping. But, with this method (lower butter, meaning less enriched) I add everything at the beginning of the mix, shortening the overall mix time while also keeping the dough relatively cool (less heat is developed by the mixer). The cooler dough, combined with a thin preshape, allows the dough to be ready for lamination in only 20 minutes (in the freezer) before proceeding to the lamination step. In case you’re reading this and thinking, wait, less butter? Boo. Don’t worry, when I go to laminate this dough, I add 38% butter (as a percentage of total dough weight).
Wanting the rolls to expand powerfully in the oven, fully filling the molds, I’ve opted for a higher protein flour (King Arthur bread flour, 12.7% protein) rather than all-purpose. The higher protein, combined with the lamination process, results in a dough with plenty of strength. So, to recap — brioche, with just enough strength from flour and lamination and just enough extensibility from eggs and butter: a perfect dough for lamination.
Let’s talk about the “lock-in” process for the butter. One key element of this process that is different from other methods is that while there are periods of chilling the dough, after the butter is laminated or “locked-in” the dough is never chilled again for more than 20 minutes. This is key. If we fully chill the block, setting the butter to a firm state, we run the risk of “sharding” or “breaking” the butter during a subsequent fold. When that happens it produces cracks in the butter layer, ruining lamination (lamination technically meaning the intact layers of dough – butter – dough). So, once the butter is added we keep it pliable, but cool, primarily using the cold as a place where the dough can relax. It is key to follow what I prescribe for the timed chilling phases. While they can be extended, lamination will often suffer.
Butter. The butter block is specifically prescribed to be thinner than usual (about 1/8” vs. a block that could be as thick as 3/8” or more). Being so thin allows it to transition from a state that’s firm enough to peel the parchment away from, while also becoming flexible in a matter of moments. Better pliability means that during rolling the butter can be extended into a very thin layer without breaking. If we do this part well the layers will be apparent in the final product. Said a different way, managing the pliability helps avoid butter breakage which is common with thicker butter blocks because it’s so hard to match the consistency of the dough and butter mediums. The additional benefit of what I’ll call this “thin lock-in” method is that butters with higher water content (“wetter butters”) and less plasticity (or “ductility”) seem to work well. I’ve been laminating with Cabot unsalted, a fine, (and widely available) butter. I also tested the recipe today with Kerrygold (which, despite a lower melting point, has been my previous go-to butter for home lamination) and it worked, although I think the Cabot is easier to work with.
Last note, related to shaping. As noted above, I’m using the commercial rings for these shapes. If you don’t want to purchase them you can make rings out of tin foil. I cut 13” lengths 1.75” wide and tape the ends with only about ½” of overlap. After rolling up the pieces I place them into the foil rings and proof them (covered well with a plastic bag). They proof up into a spiral shape as impressive and puffed as the hairdo my 8th grade typing teacher had and bake into a gorgeous swirl (egg wash before baking). They can be filled from the bottom and garnished as you wish.
Ok. Let’s bake.

Brioche suprême
Yield: Four 4” by 1.75” pastries
Duration: 5 to 7 hours, depending on ambient conditions
Yeast, dry instant, 7g
Water, 14g
Eggs, whole, 75g (Roughly one large egg plus one yolk. If you’re a little short add a few grams of water to cover the gap. Also, doubling the dough works well as the egg requirement is exactly three large eggs.)
*Water and eggs should be room temperature, roughly 72 to 74˚F.


To the bowl of a stand mixer add the eggs, water, and yeast. Whisk vigorously by hand to combine. Note: This allows the yeast to hydrate before adding the remaining ingredients. If you skip this step you may see flecks of unactivated yeast in the dough after mixing.
Bread flour, (12.7% protein), 150g
Salt, fine, 4g
Sugar, 15g
Butter, unsalted, soft, 36g
Add the flour, salt, sugar, and soft butter to the yeast slurry and mix on medium (speed 4 in my KitchenAid 6 qt. stand mixer) with a dough hook for 7 minutes, scraping as necessary. The mixture will begin as a slightly crumbly mess before starting to stick to the bottom of the bowl (keep scraping to help it release), and then finally ending by climbing the hook (scrape it down off the hook to ensure that it’s actually mixing, not merely spinning around the bowl).
At the end of mixing the dough will be smooth, elastic, and will clean the bowl. Check the dough’s temperature after mixing: it should be between 70 and 75˚F. If it’s warmer than 75˚F, place it in a cool location. If it’s cooler than 70˚F, place it someplace warm.
Cover and set to rise at room temperature (72 to 74˚F) for 1 to 1.5 hours. During the rise the dough will puff slightly but not double in size.
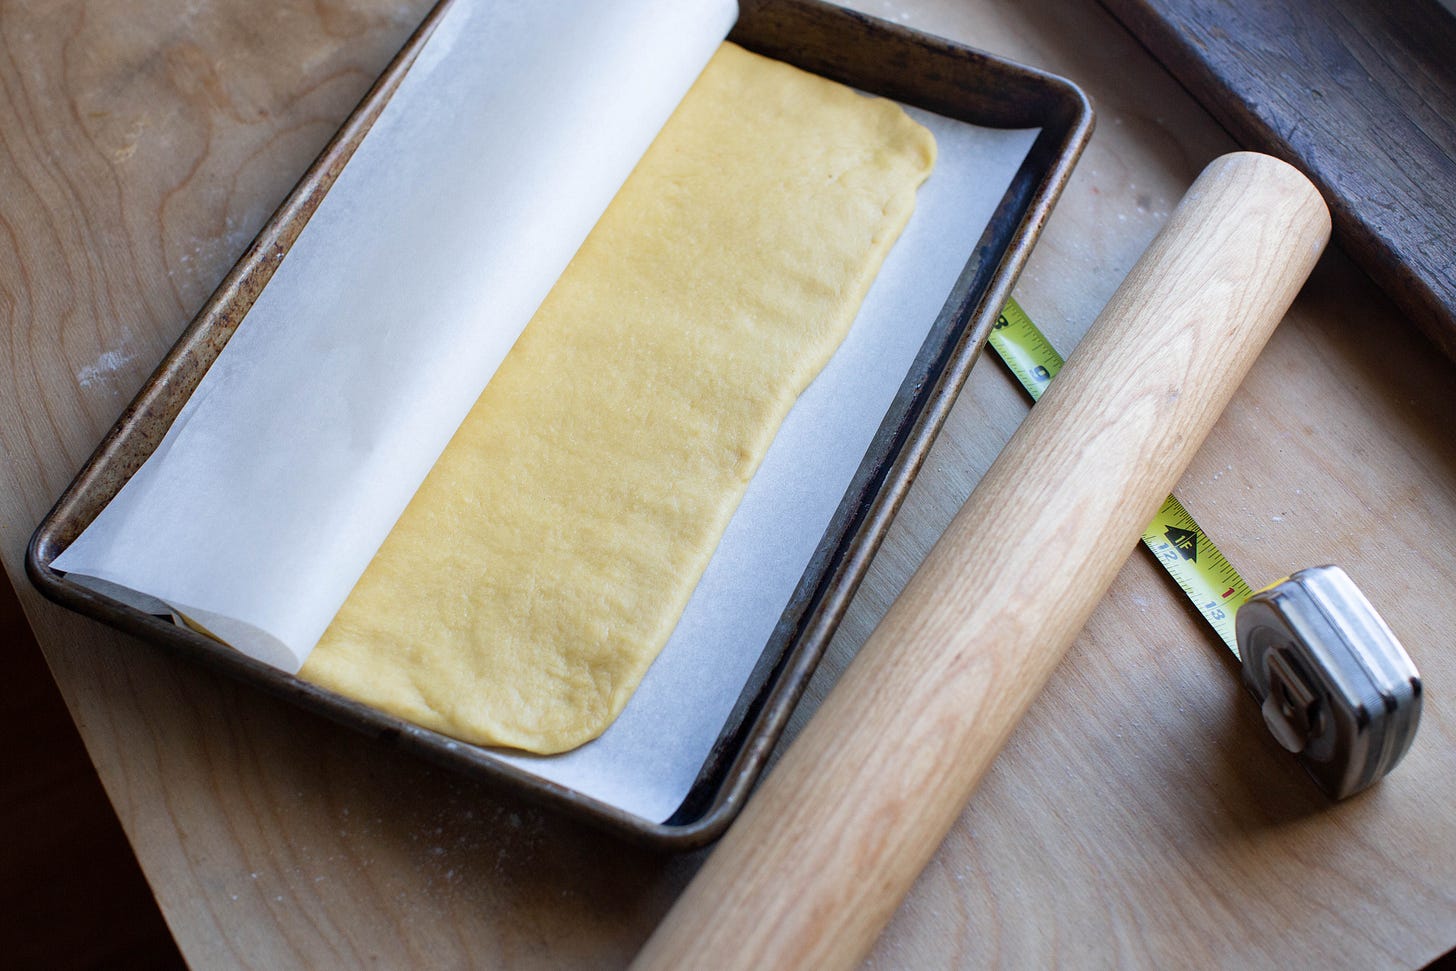
Dump the dough out of the bowl onto a lightly floured surface. Lightly flour the top then press, stretch, and roll into an exact rectangle, 5” by 12”. Cover tightly and freeze for 20 minutes.

Butter, unsalted, 113g (Butter should be cool and solid but not hard)
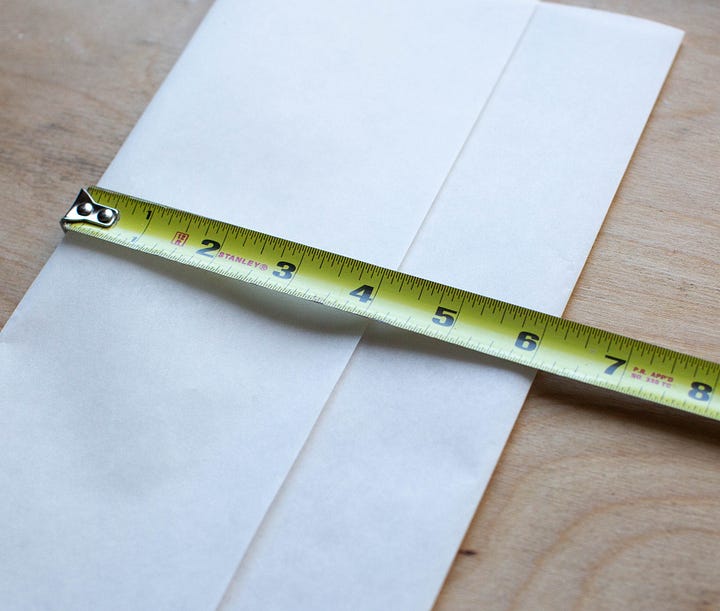
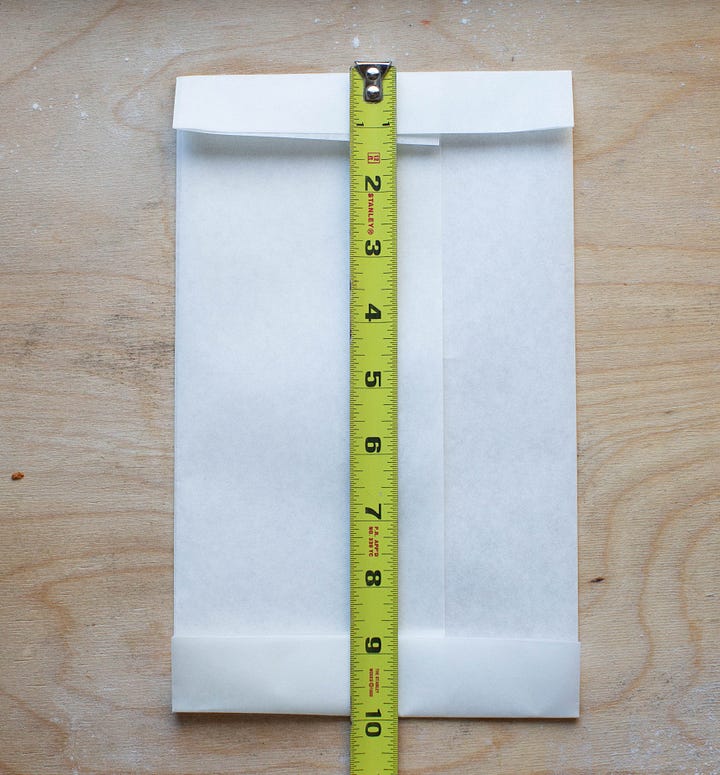
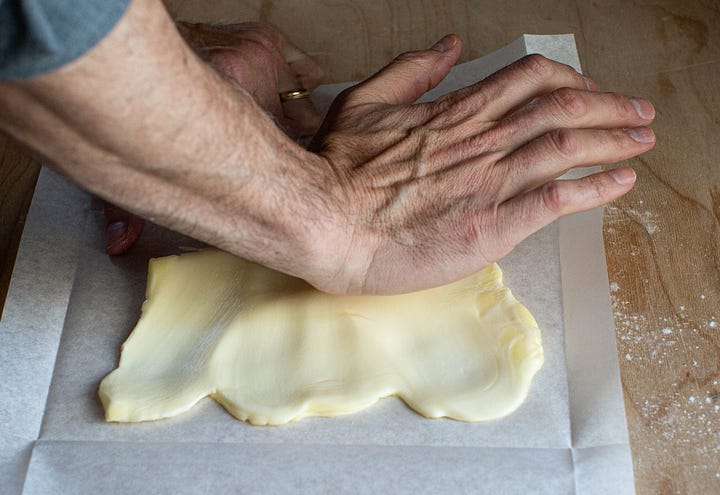
While the dough chills, prepare the butter block. Fold a half sheet of parchment to form a rectangle with closed top and sides measuring exactly 6” by 10”. Add the room temperature butter to the center of the rectangle and flatten to a thin layer using the heel of your hand. Don’t worry about the corners, you’ll take care of those in the next step. Close the paper over the butter and further smear into the corners with a rolling pin.
Freeze the butter for 5 minutes or so, it won’t take long to become firm.


Remove the dough and butter from the freezer. On a lightly floured surface roll the dough to 6” wide and 20” long, doing your best to square the corners (stretch them gently with your hands if necessary). Gently peel open one side of the butter block and place, butter side down, atop the dough. In cooler months, let it rest briefly as it warms and becomes pliable, a minute or so. In warmer months it may not be necessary to wait. Fold the dough piece to cover the butter and press to seal. Pierce any air bubbles.
Gently and evenly roll the mass to 20” in length, being careful to keep the dough piece narrow, roughly 6” wide. (If it spreads to 7”, it’s ok.)
Dust any bench flour off the dough then perform a book fold by folding the ends of the piece to the middle and then folding the ends to the middle a second time. The dimension of the dough block after the book fold should be roughly 7” or 8” long by 5” wide. (If the book fold (“double fold”) or the letter fold (“single fold”) are confusing or unfamiliar, there are good videos on YouTube that show the process better than they can be described with words.)
Turn the dough 90˚ and roll to 16” by 6”. Trim the ends to square them off. Dust to remove any bench flour, then perform a letter fold and press the layers to seal. After the letter fold the dough should measure 6” by 6”.
Cover well (I fold mine up inside the parchment I used for the butter block), and chill in the refrigerator until cool, 20 minutes.
After the chill the dough should be firm but pliable.
With the smooth side of the dough piece facing you, roll the dough to 6 1/2” by 12” then trim the ends to square. After trimming the length may be closer to 11". Trim the width to exactly 6” wide. (Trimming the sides exposes the lamination, making for a better final visual of the layers.)

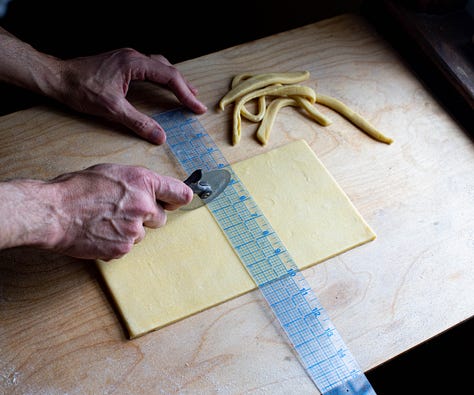

Using a ruler, measure and cut 1.5” by 11” strips. These strips are sized for rings measuring 4” by 1.75”. Each piece should weigh between 80 and 82g.
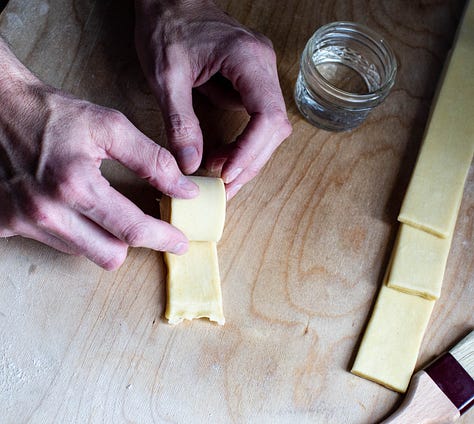


Brush the surface to remove any dusting flour then brush with water or egg and loosely roll up the pieces. I flatten the end to help it seal then rest it on the sealed portion while I finish rolling any remaining pieces.
Place the ring molds on a parchment-lined sheet tray then place the dough pieces in the center. Place an additional sheet of parchment over the top of the rings and make a lid by placing an additional half sheet pan on top which will remain in place during the final proof.
At my house in Vermont, sitting in a 64 to 67˚F room, the final proof takes an average of roughly 5 hours. But, if placed in the oven with the light on and a pan of warm water that I refresh every 45 minutes or so, that time can be cut in half. But be careful with anything that you do to encourage the rate of proof. If the butter melts or even gets too soft (avoid anything over 85˚F), it will melt and run out. (Remember Butter Leak Crevasse? It’s deadly.) Last note here: I occasionally take the tray and parchment cover off and gently press the “tails” to encourage them to adhere to the dough piece. If they unfurl some, it’s ok, don’t fret too much if that happens.
The rolls are ready for the oven when they are roughly 1/4” to 1/8” from the inside edge of the ring (it’s ok to lift the sheet tray, peel back the parchment paper, and check on them). It’s important to fully proof the rolls, waiting until they fill the ring molds. If they are loaded before they are fully proofed they won’t have the open structure that we want or the crisp shape which is an exact cylinder.
Towards the end of proof, preheat the oven. I have been baking these using the convection bake setting on my gas oven. As gas ovens are only heated from the bottom in most cases, the circulation feature supports a more even bake. If you have an electric oven, there is likely both a top and bottom element, providing a more even distribution of heat (than gas). If you have a gas convection oven, use the convection bake setting set at 375˚F with a rack on a middle rung. For gas ovens with no convection, bake at 400˚F with a rack in the upper third of the oven (to prevent too much bottom color). For electric ovens, also use the convection setting if you have it, set at 375˚F. And last, for electric with no convection, set the oven at 400˚F with a rung in the middle. (These temperatures are good starting points – as with anything precious, keep an eye on it, adjust as needed.)
Bake the suprêmes for 15 minutes with the baking tray lid sitting on top of the molds.
After 15 minutes remove the baking tray and parchment and reduce the heat by 25˚F. You will likely notice some butter leakage. This is normal and a casualty of the use of the baking tray which slows heating and reduces evaporation. The tray is required to ensure that the final product has beautiful sharp edges where it expands against the sheet tray cover and molds. In talking over this problem with my dear friend Jud Smith, the head baker and co-owner of Brimfield Bread Oven (the best full-service wood-fired bakery in the country), he suggested a slight reduction in the roll-in butter quantity (currently on the high side at 38% of the dough weight). With more testing this might be something to pursue. For now, I’ll deal with a small amount of leak knowing that the structure has been very, very good.
Bake for another 10 minutes then remove the molds and bake for an additional 5 to 10 minutes or until you achieve what my excellent colleague at KABC, Jessica Battilana, likes to call: “GBD.” That’s Golden, Brown, and Delicious.
After a total of 30 to 35 minutes of baking (assuming they are chestnut-colored and beautiful), remove the rolls and place on a cooling rack, allowing air to circulate underneath them. (In humid months you might even consider letting them coast in the off oven, further drying and crisping.)
Cool for at least one hour then fill and garnish. They are best eaten on the same day as they are baked for maximum crispness, flake, and smiles.
In the next newsletter I’ll share all formulas for fillings and garnishing techniques. As a preview here are a few details.
For every flavor of suprême that I’ve made I’ve started with the basic vanilla pastry cream from my book (any firm-setting pastry cream will work). For a chocolate version I add 25% chocolate chips (as a percentage of the milk in the recipe) as well as a little cinnamon, stirring them in after the pastry cream thickens, off heat. That makes a very rich, aromatic, chocolate-forward pastry cream that sets well. Once chilled I add an equal portion by weight of whipped cream (or less for more intensity, you decide). I’m still on the fence as to whether I prefer a 2/3 pastry cream to 1/3 whipped cream ratio or the 50/50. The result is mousse-like and incredible —a true crème légère. For a raspberry version I add fresh raspberries (or jam) and freeze-dried raspberry powder to the vanilla pastry cream (after chilling) then fold in whipped cream until I reach a consistency I like (again, roughly equal parts pastry cream and whipped cream but that’s your call). Garnish with chocolate ganache, meringue, or simply dust with confectioners sugar to bring out the beautiful lamination and call it a day.
Thanks for reading! Look for the next email in the coming days. And in the meantime, please don’t be shy about sharing or reposting.
With gratitude,
Martin


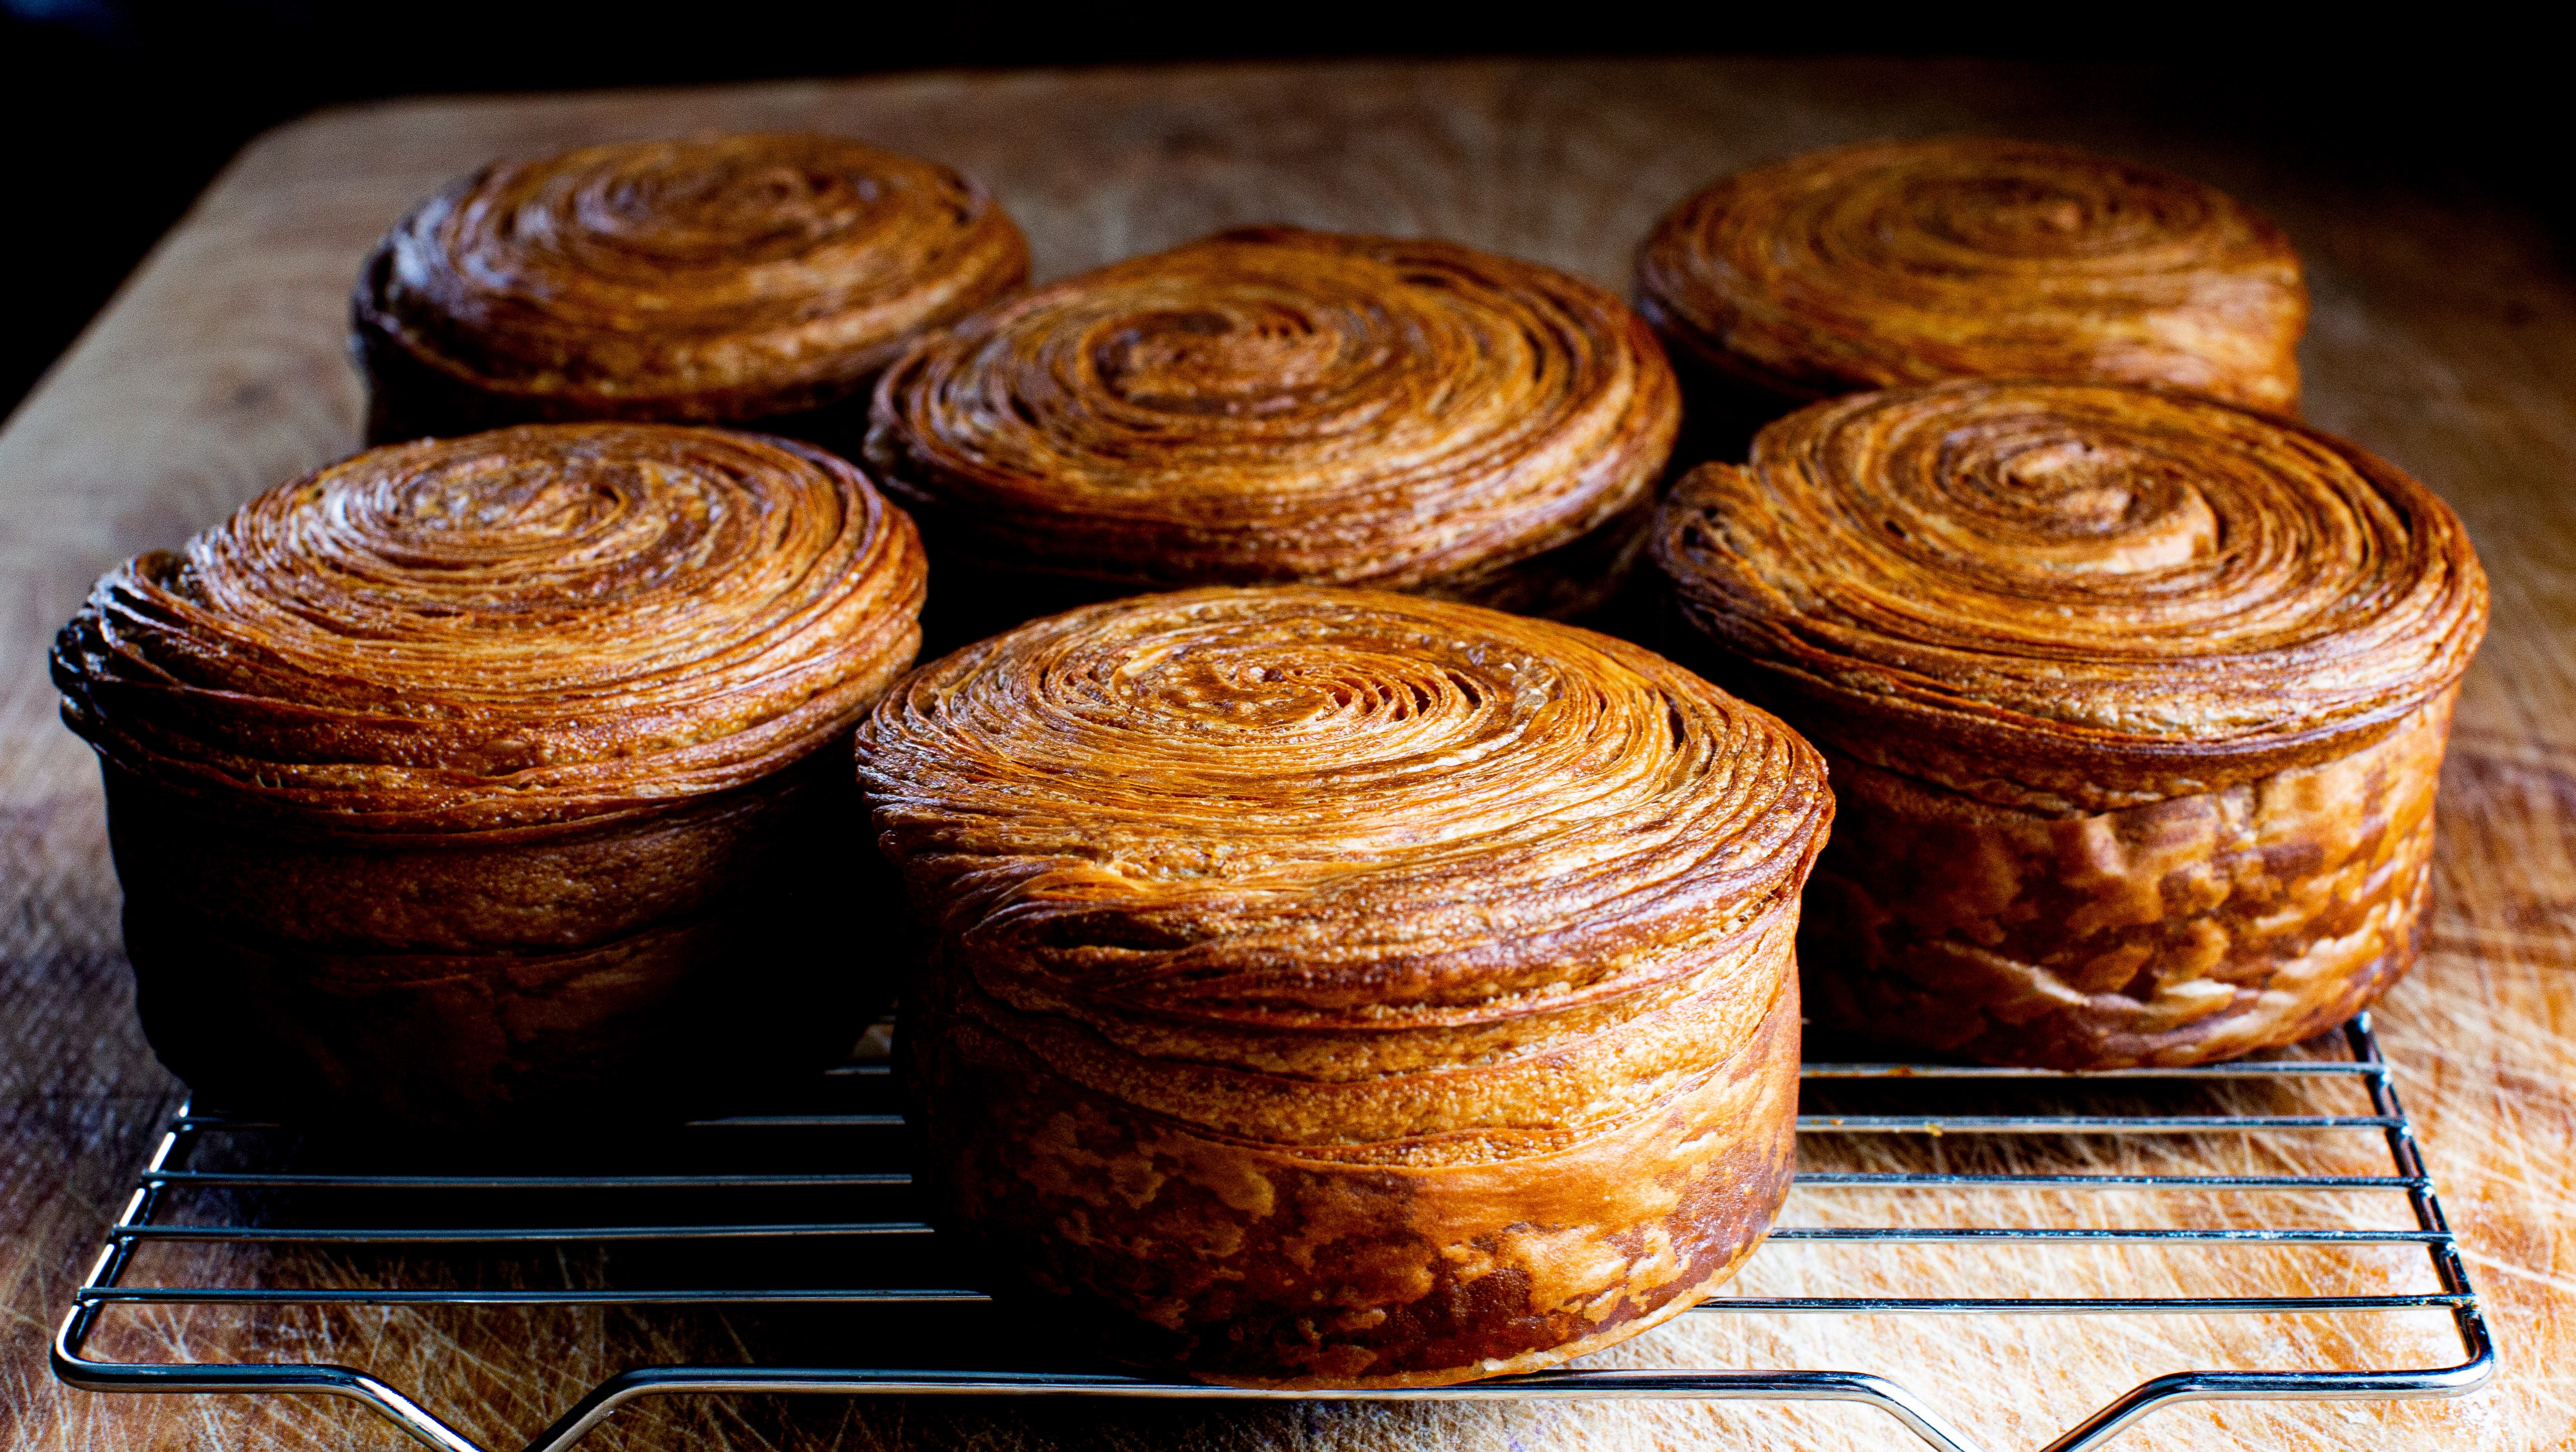
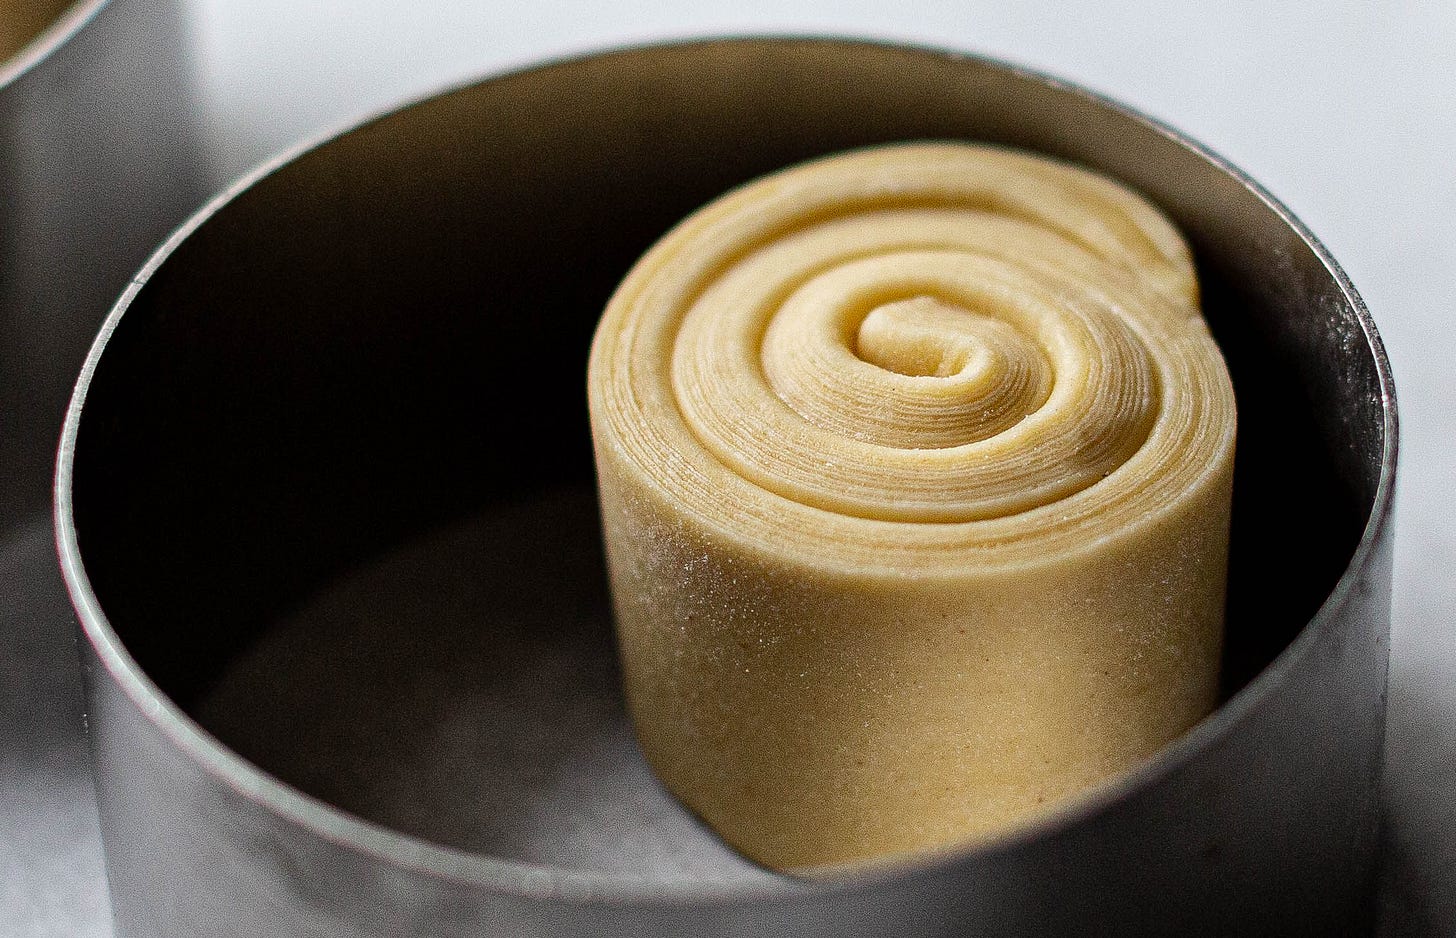


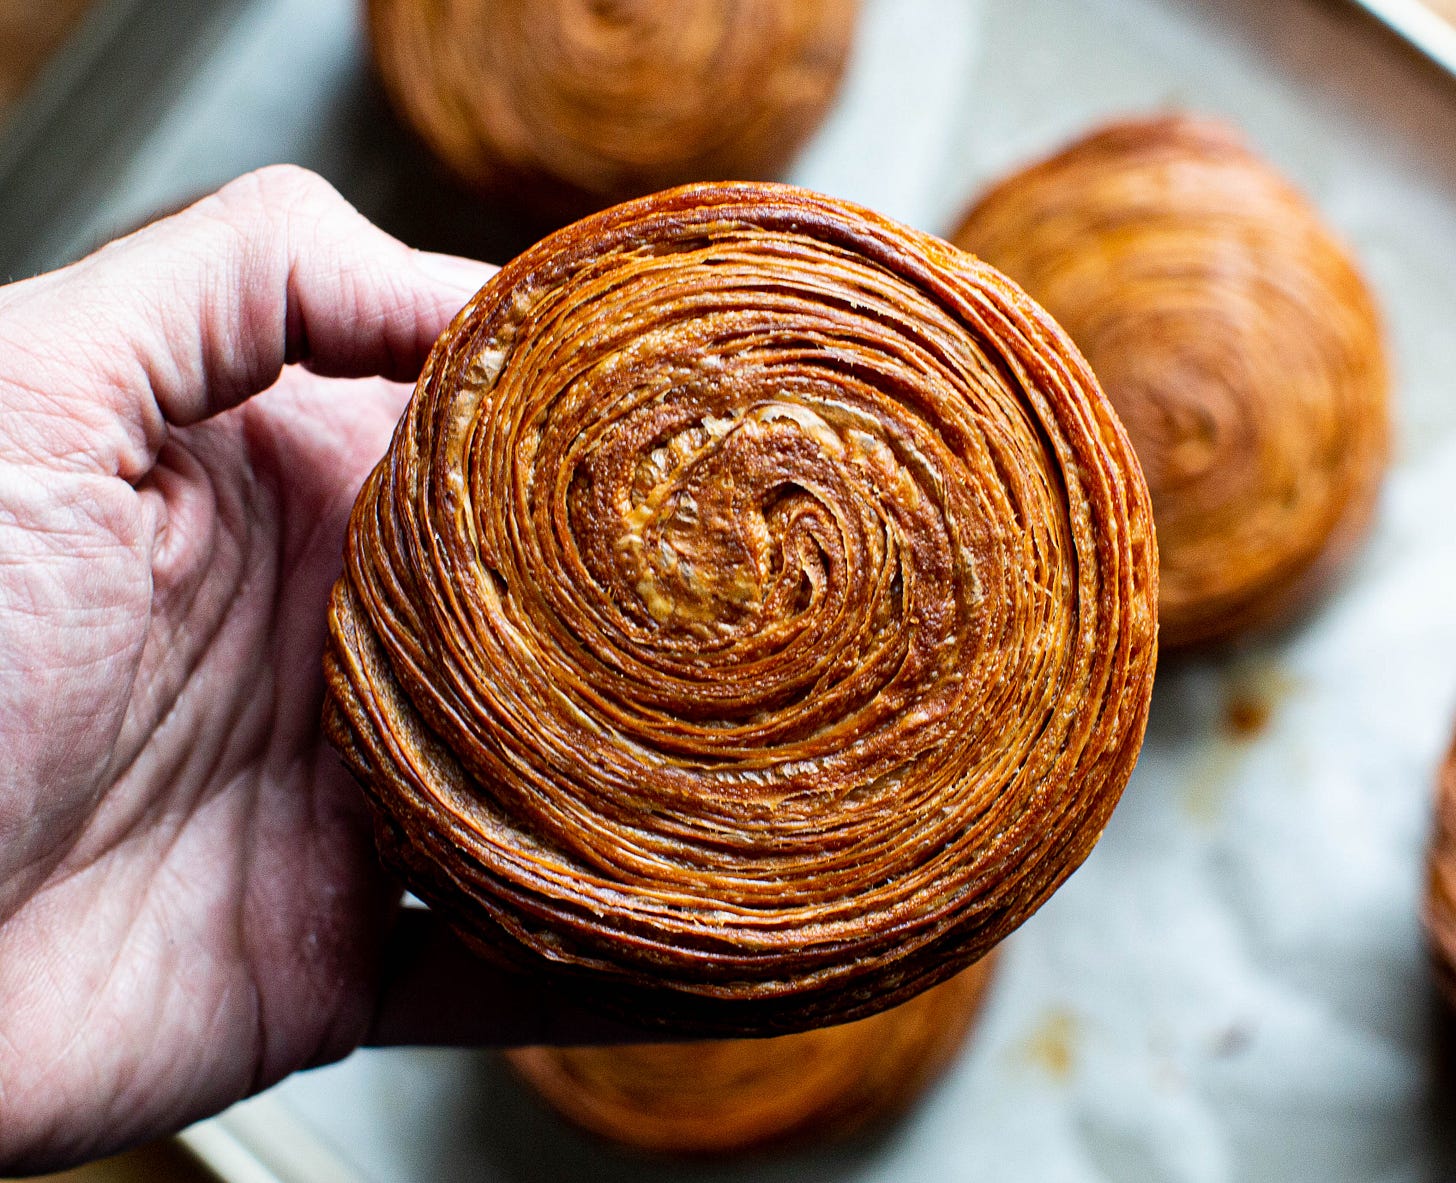



I just baked this excellent recipe in a kitchen with 59% humidity and 33c. I live in Lagos, Nigeria. I anticipated the challenges. I had to chill the dough multiple times. The final proof was super fast, I refused to panic and continued to bake. The final result was fantastically good! I took lots of notes. I filled them with whipped cream and topped with a brown sugar toasted Italian meringue! My confidence has increased immensely! I will continue to make this every week. A thousand thank yous Martin!
I'm very excited to try this, Martin. I've been working on various lamination recipes. Learned great basics at KAF. Is this a dough one would use for pain aux raisin? Not sure what the French would say! Love your book, Cathy