


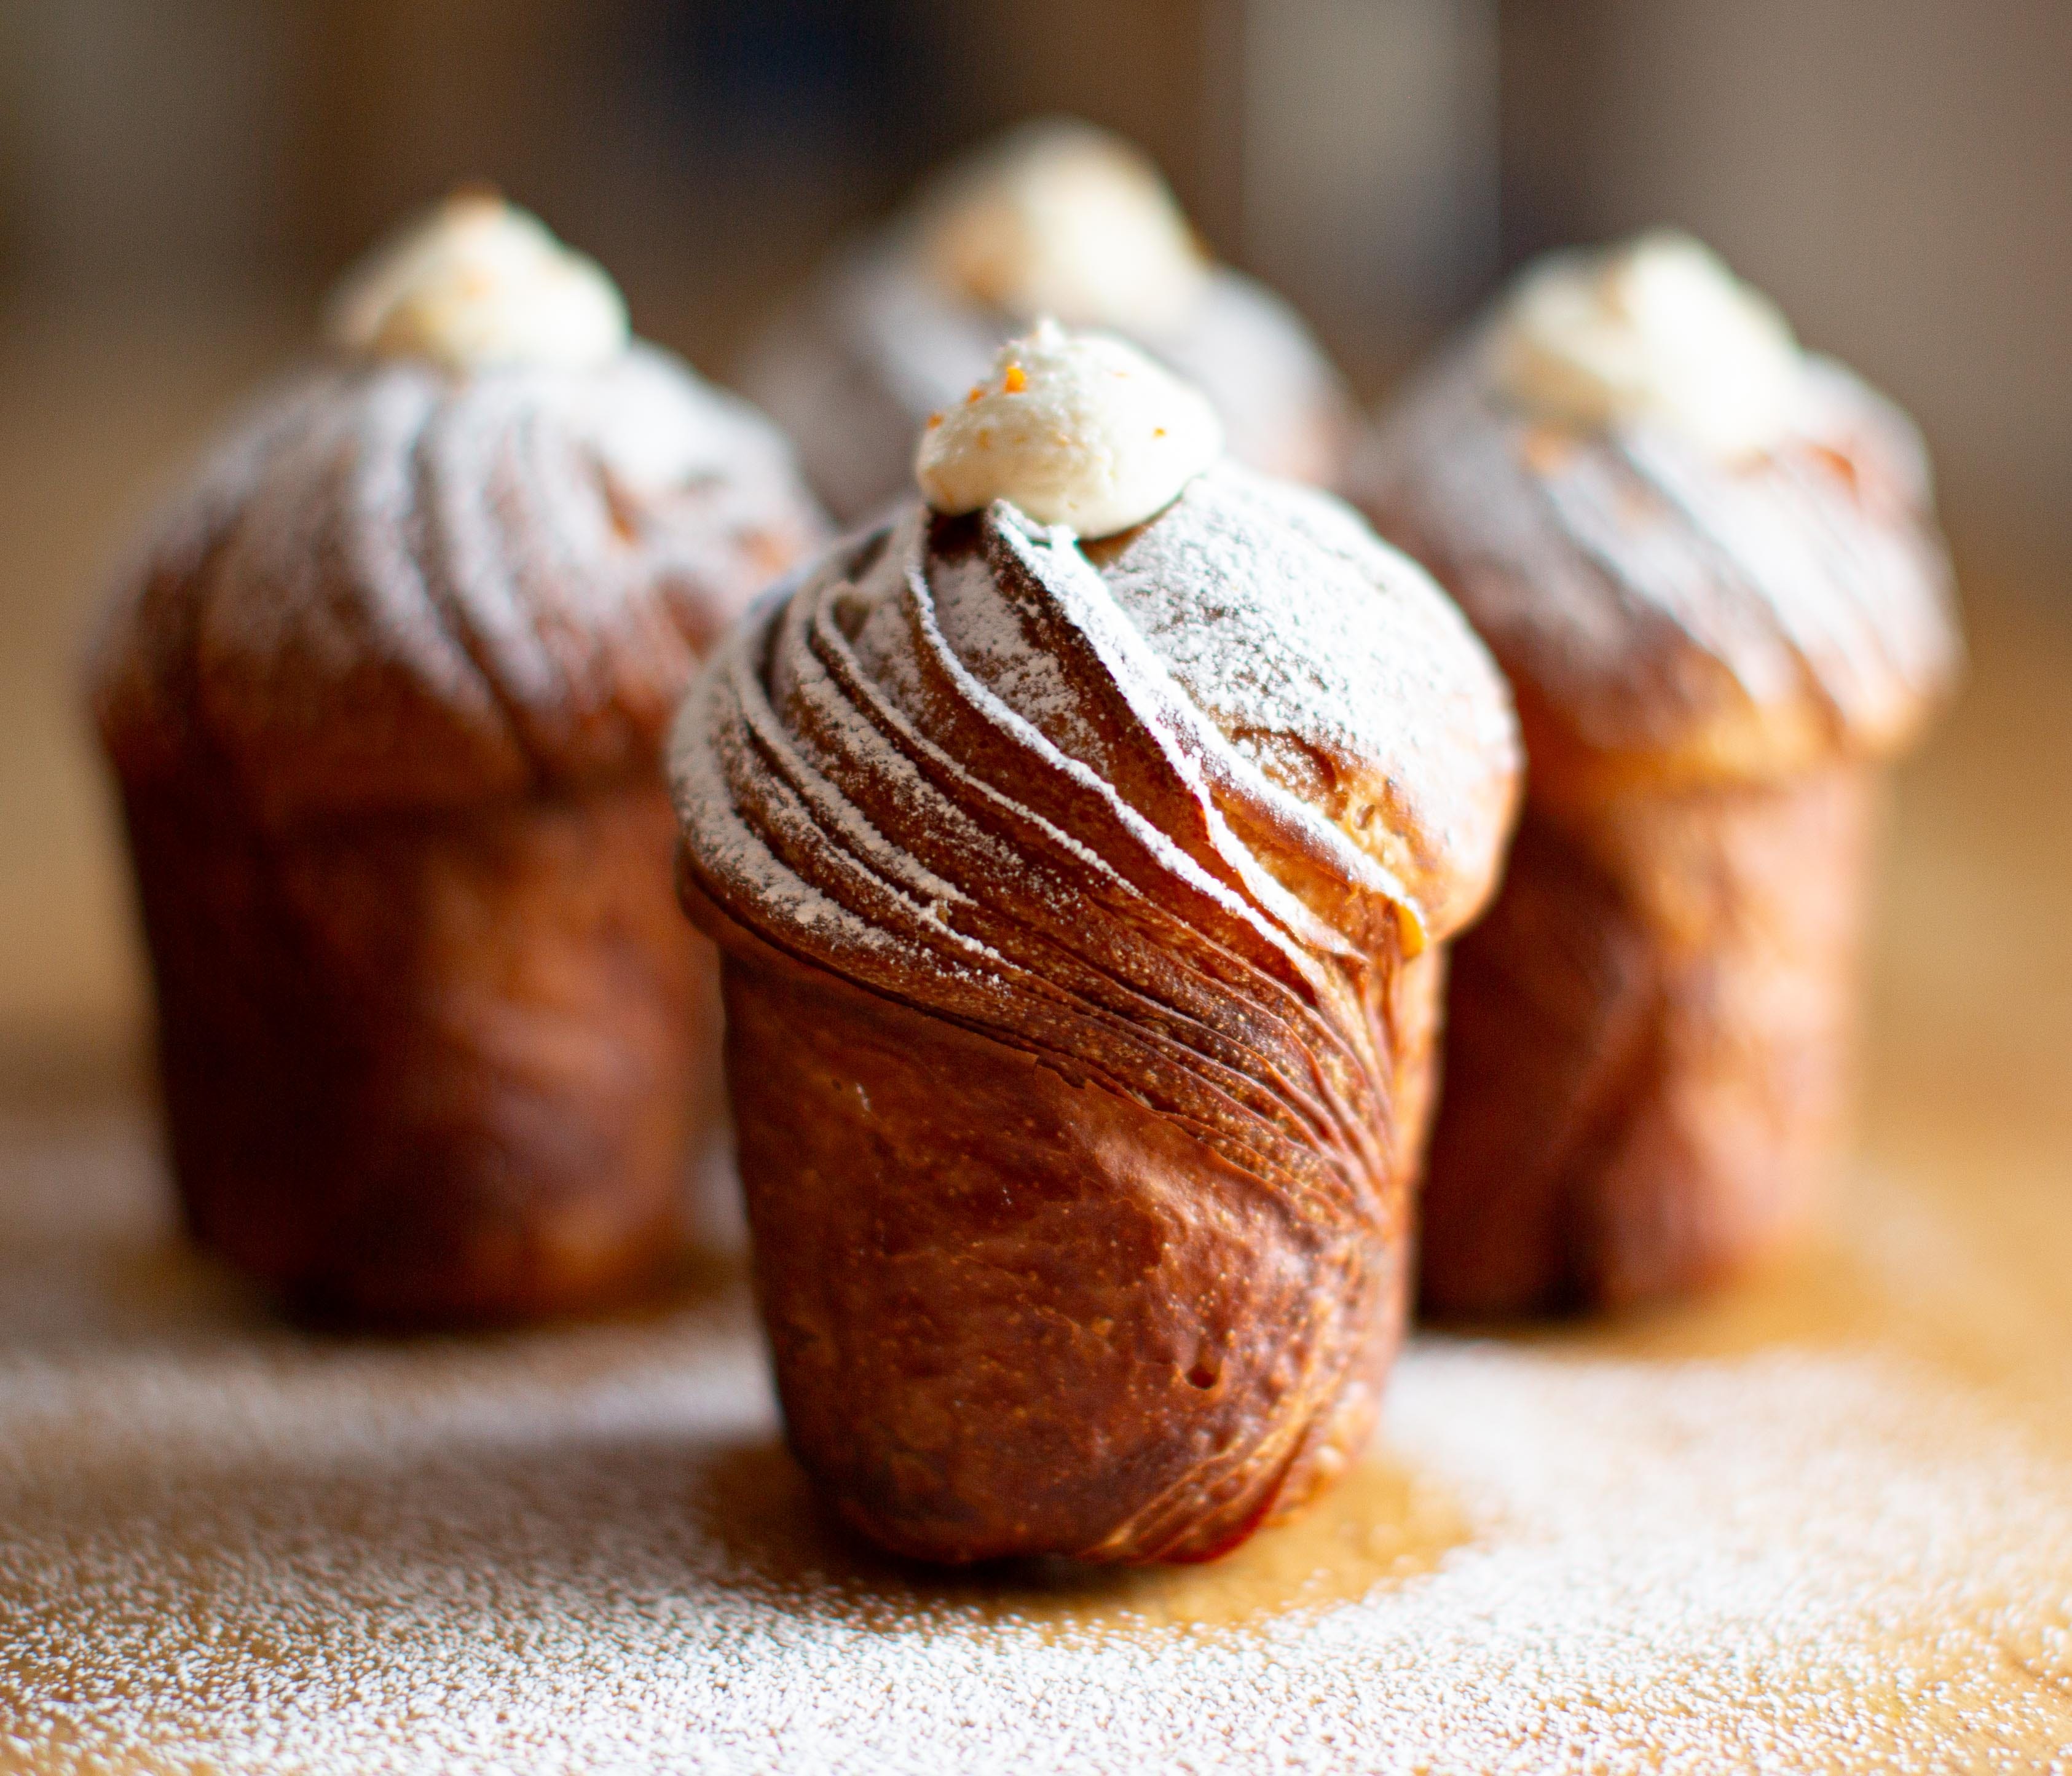
The Flaky Creamsicle
Laminated brioche with citrus-infused butter
From plans to get honey bees to improving at archery and remembering my vitamins, January has landed as it does—full of hope for great plans and many wishes for a delicious year.
Rather than looking too far backwards, or further ahead than I can see, I’m kicking the tires, checking the mirrors, and considering where to stop for coffee. Let’s get this show on the road.
The winter months always bring me back to citrus: buttery navel oranges, ruby red grapefruit, satsumas, pomelos, and clementines. Two years ago, the season inspired a special crust that led to one of my favorite pies. This year, spurred again, I’ve been sorting out an orange-infused laminated brioche with the flavors of a creamsicle.
Let’s make them.
Creamsicle Cruffins
Yield: 6 cruffins
Note: For the full explanation of this dough and method that I also used in the suprêmes, have a look at what I previously wrote about this process for lamination. In that piece, I go through the full how and why of what I think is a great, manageable method for beautiful layers and relatively easy lamination.
Yeast, dry instant, 9g (1 T)
Water, 20g (In cool months, use warm water, 100 to 110°F. In hot months, use cool room temperature, 60 to 65°F.)
Eggs, whole, 112g (Two large eggs. If you’re a little short on the weight, add warm water to cover the missing portion if you don’t want to crack another egg. In cool months, warm the eggs in hot water, in hot months use cool or cold eggs.)
To the bowl of a stand mixer add the yeast, water, and eggs. Whisk vigorously by hand to combine, this allows the yeast to hydrate before adding the remaining ingredients. If you skip this step you may see flecks of unactivated yeast in the dough after mixing. While the yeast hydrates, measure the dry ingredients and butter.
All-purpose flour, 11.7%, 225g
Salt, fine, 6g (1 t)
Sugar, granulated, 20g
Butter, unsalted, soft, 56g
Add the flour, salt, sugar, and soft butter to the yeast slurry and mix on medium (speed 4 in my KitchenAid 6 qt. stand mixer) with a dough hook for 7 minutes, scraping as necessary. The mixture will begin as a slightly crumbly mess before becoming cohesive.
At the end of mixing the dough will be smooth, elastic, and will clean the bowl. Check the dough’s temperature after mixing: it should be between 70˚F and 75˚F. If it’s warmer than 75˚F, place it in a cool location. If it’s cooler than 70˚F, place it someplace warm.
Knead briefly to form a ball then cover and set to rise at room temperature (72˚F to 74˚F) until puffy and almost double in size, 1 to 2 hours.
After the first rise, dump the dough out of the bowl onto a lightly floured surface. Lightly flour the top then press, stretch, and roll into an exact rectangle, 9” by 15”. Cover tightly, place on a sheet tray, and chill for 10 to 20 minutes.
Now that the dough has fermented some and you’ve made an initial pass at elongating it, it’s time to prepare for the part that seems to cause the most fear: lamination. In the event you’re concerned, remember that I wrote this method with the express purpose of helping you to achieve great layers while also avoiding common pitfalls that are often written into recipes.
The full back story on this dough and process, as I mentioned above, is in the piece I wrote on the suprêmes. Here are the basics. First, the dough is slightly soft which makes it easier to roll. Second, the butter sheet is very thin, allowing it to change temperature quickly, moving from chilled and breakable to pliable and easy to work in a matter of minutes. (Pliability is key for avoiding breaking or “sharding.”) And third, the folds are performed in succession, without any chilling. This also supports easier rolling and much less opportunity for the butter to break.
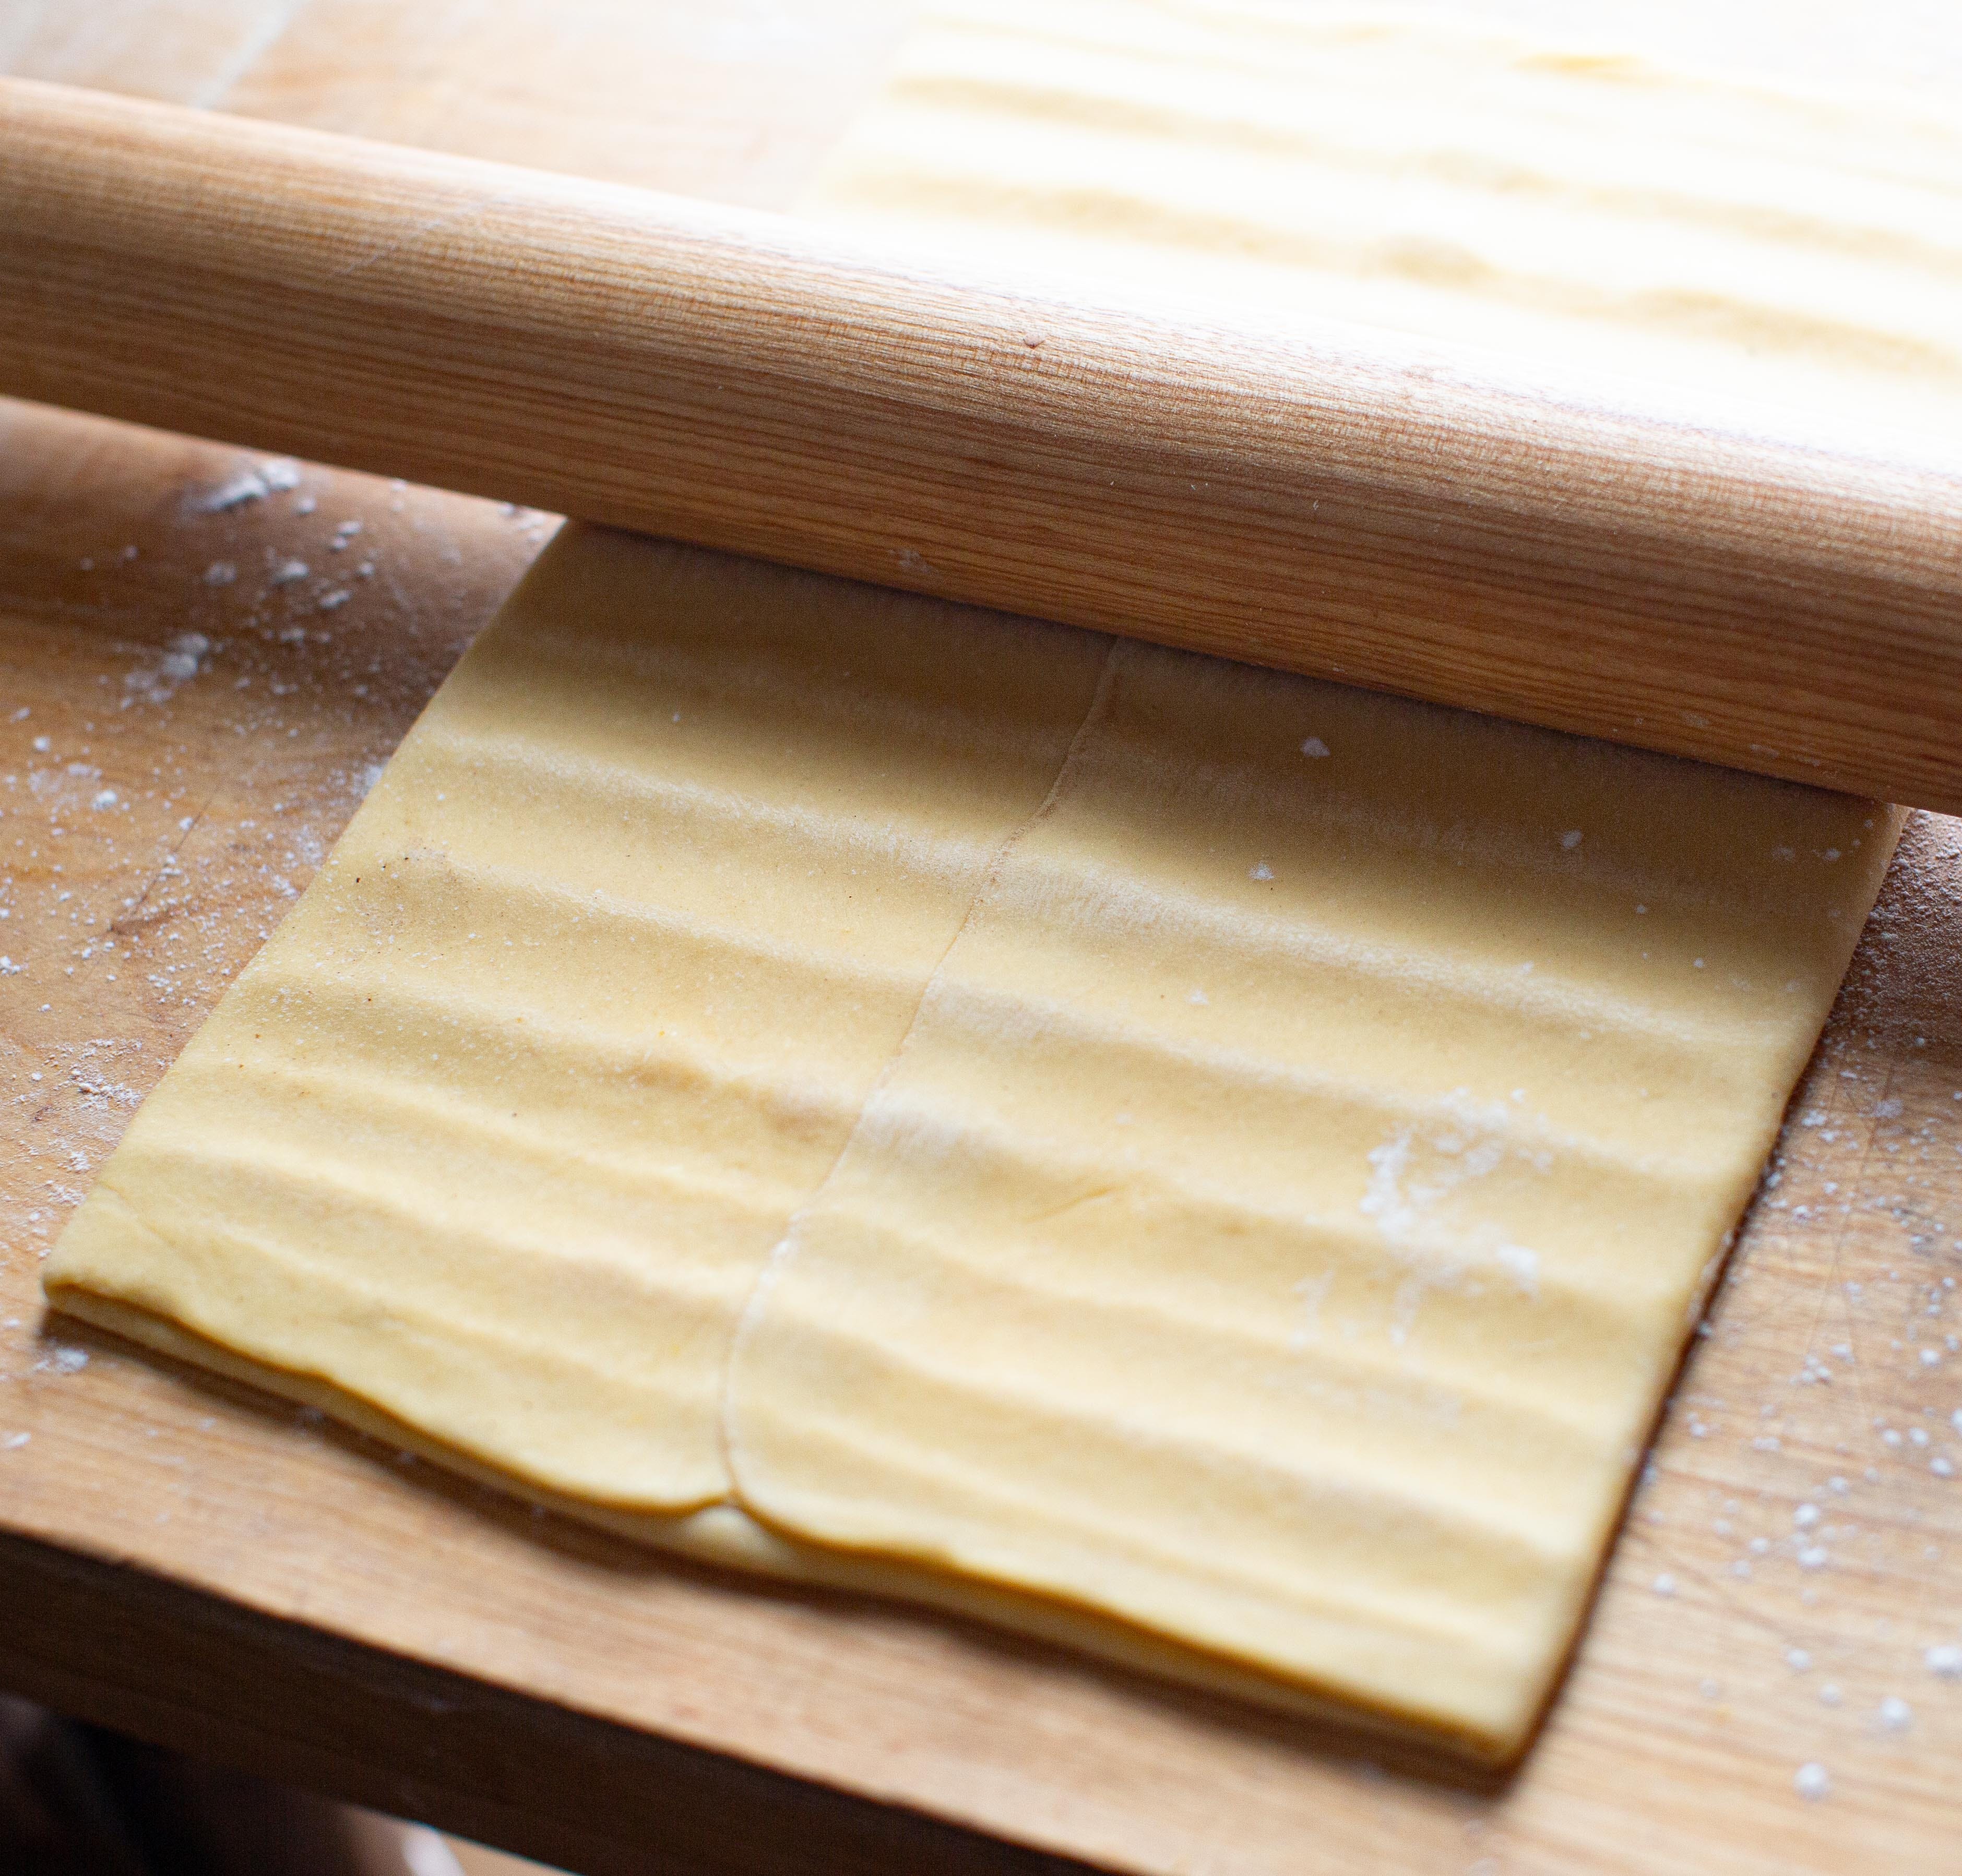
A couple additional things to keep in mind. First, roll to the dimensions that I specify and confirm with a tape measure. (At the bottom of the newsletter I summarized the rolling dimensions and steps.) Second, use a minimum amount of bench flour during folds. If you’re having trouble keeping the dough floating on the bench, lightly flour your dough and surface, but do take the time to brush away any excess flour. If things are especially dry I use a mister to add a small amount of moisture, ensuring that my layers adhere well as I fold. And last, when I’m rolling the dough to size, I always begin by making rows of indentations, pressing the rolling pin into the dough, forming ridges. Then, I return to the middle of the dough and roll towards the edges. Ok, back to the action.


While the dough chills, prepare the butter block and zest a large orange. Fold a half sheet of parchment (12” by 16”) to form a rectangle with closed top and sides measuring exactly 8” by 10” (working with the paper running left to right, lengthwise, fold the sides to meet without overlapping, then fold the bottom and top edge 1” towards the middle).
Orange zest, 6 to 8g (one large navel orange)
Butter, unsalted, 168g, room temperature (1.5 U.S. sticks) (Room temperature should be pliable but not soft. In warm months, place the dough in a cooler spot for easier handling.)
Add the room temperature butter to the center of the parchment and flatten to a thin layer using the heel of your hand. Don’t worry about the corners, you’ll take care of those in the next step. Close the paper over the butter and further smear into the corners with a rolling pin, forming an even layer. Again, once folded, filled, and smooth, the package should measure exactly 8” by 10”.
Chill the butter sheet until firm, about 5 minutes.
Remove the dough from the refrigerator. On a lightly floured surface roll to 10” wide and 18” long, doing your best to square the corners (stretch them gently with your hands if necessary). Gently peel open one side of the butter block and place, butter side down, atop the dough, aligning it so that the 10” side fits exactly atop the 10” height of dough. Press gently so that it adheres, then slowly and carefully peel away the parchment paper.
Fold the dough piece to cover the butter and press to seal. After adding the butter and folding in the sides, the dough piece should measure roughly 9" by 10".
Gently and evenly roll the mass to 20” in length along the long axis, being careful to keep the dough piece narrow, roughly 9.5” wide. (If it spreads to 10”, it’s ok.)
Rotate the dough 90°, dust off any bench flour, then perform a letter fold. The dimension of the dough block after the letter fold should be roughly 7” wide by 9.5” high. (If the letter fold (aka “single fold”) is confusing or unfamiliar, there are good videos on YouTube that show the process better than they can be described with words.)
Roll to 10” by 22” along the long axis. Dust to remove any bench flour, then perform a second letter fold and press the layers to seal. After the letter fold the dough should measure 7.5” by 10”.

Gently roll the dough to 11" by 11". Cover well (I fold mine up inside the parchment I used for the butter block), and chill in the refrigerator until cool, 10 to 20 minutes.
After the chill the dough should be firm but pliable.


Roll to 12” by 12”. Cut the dough piece into 6 strips, each 2” wide and 12” long. Cut each strip in half once more, yielding a total of twelve 2” by 6” pieces.
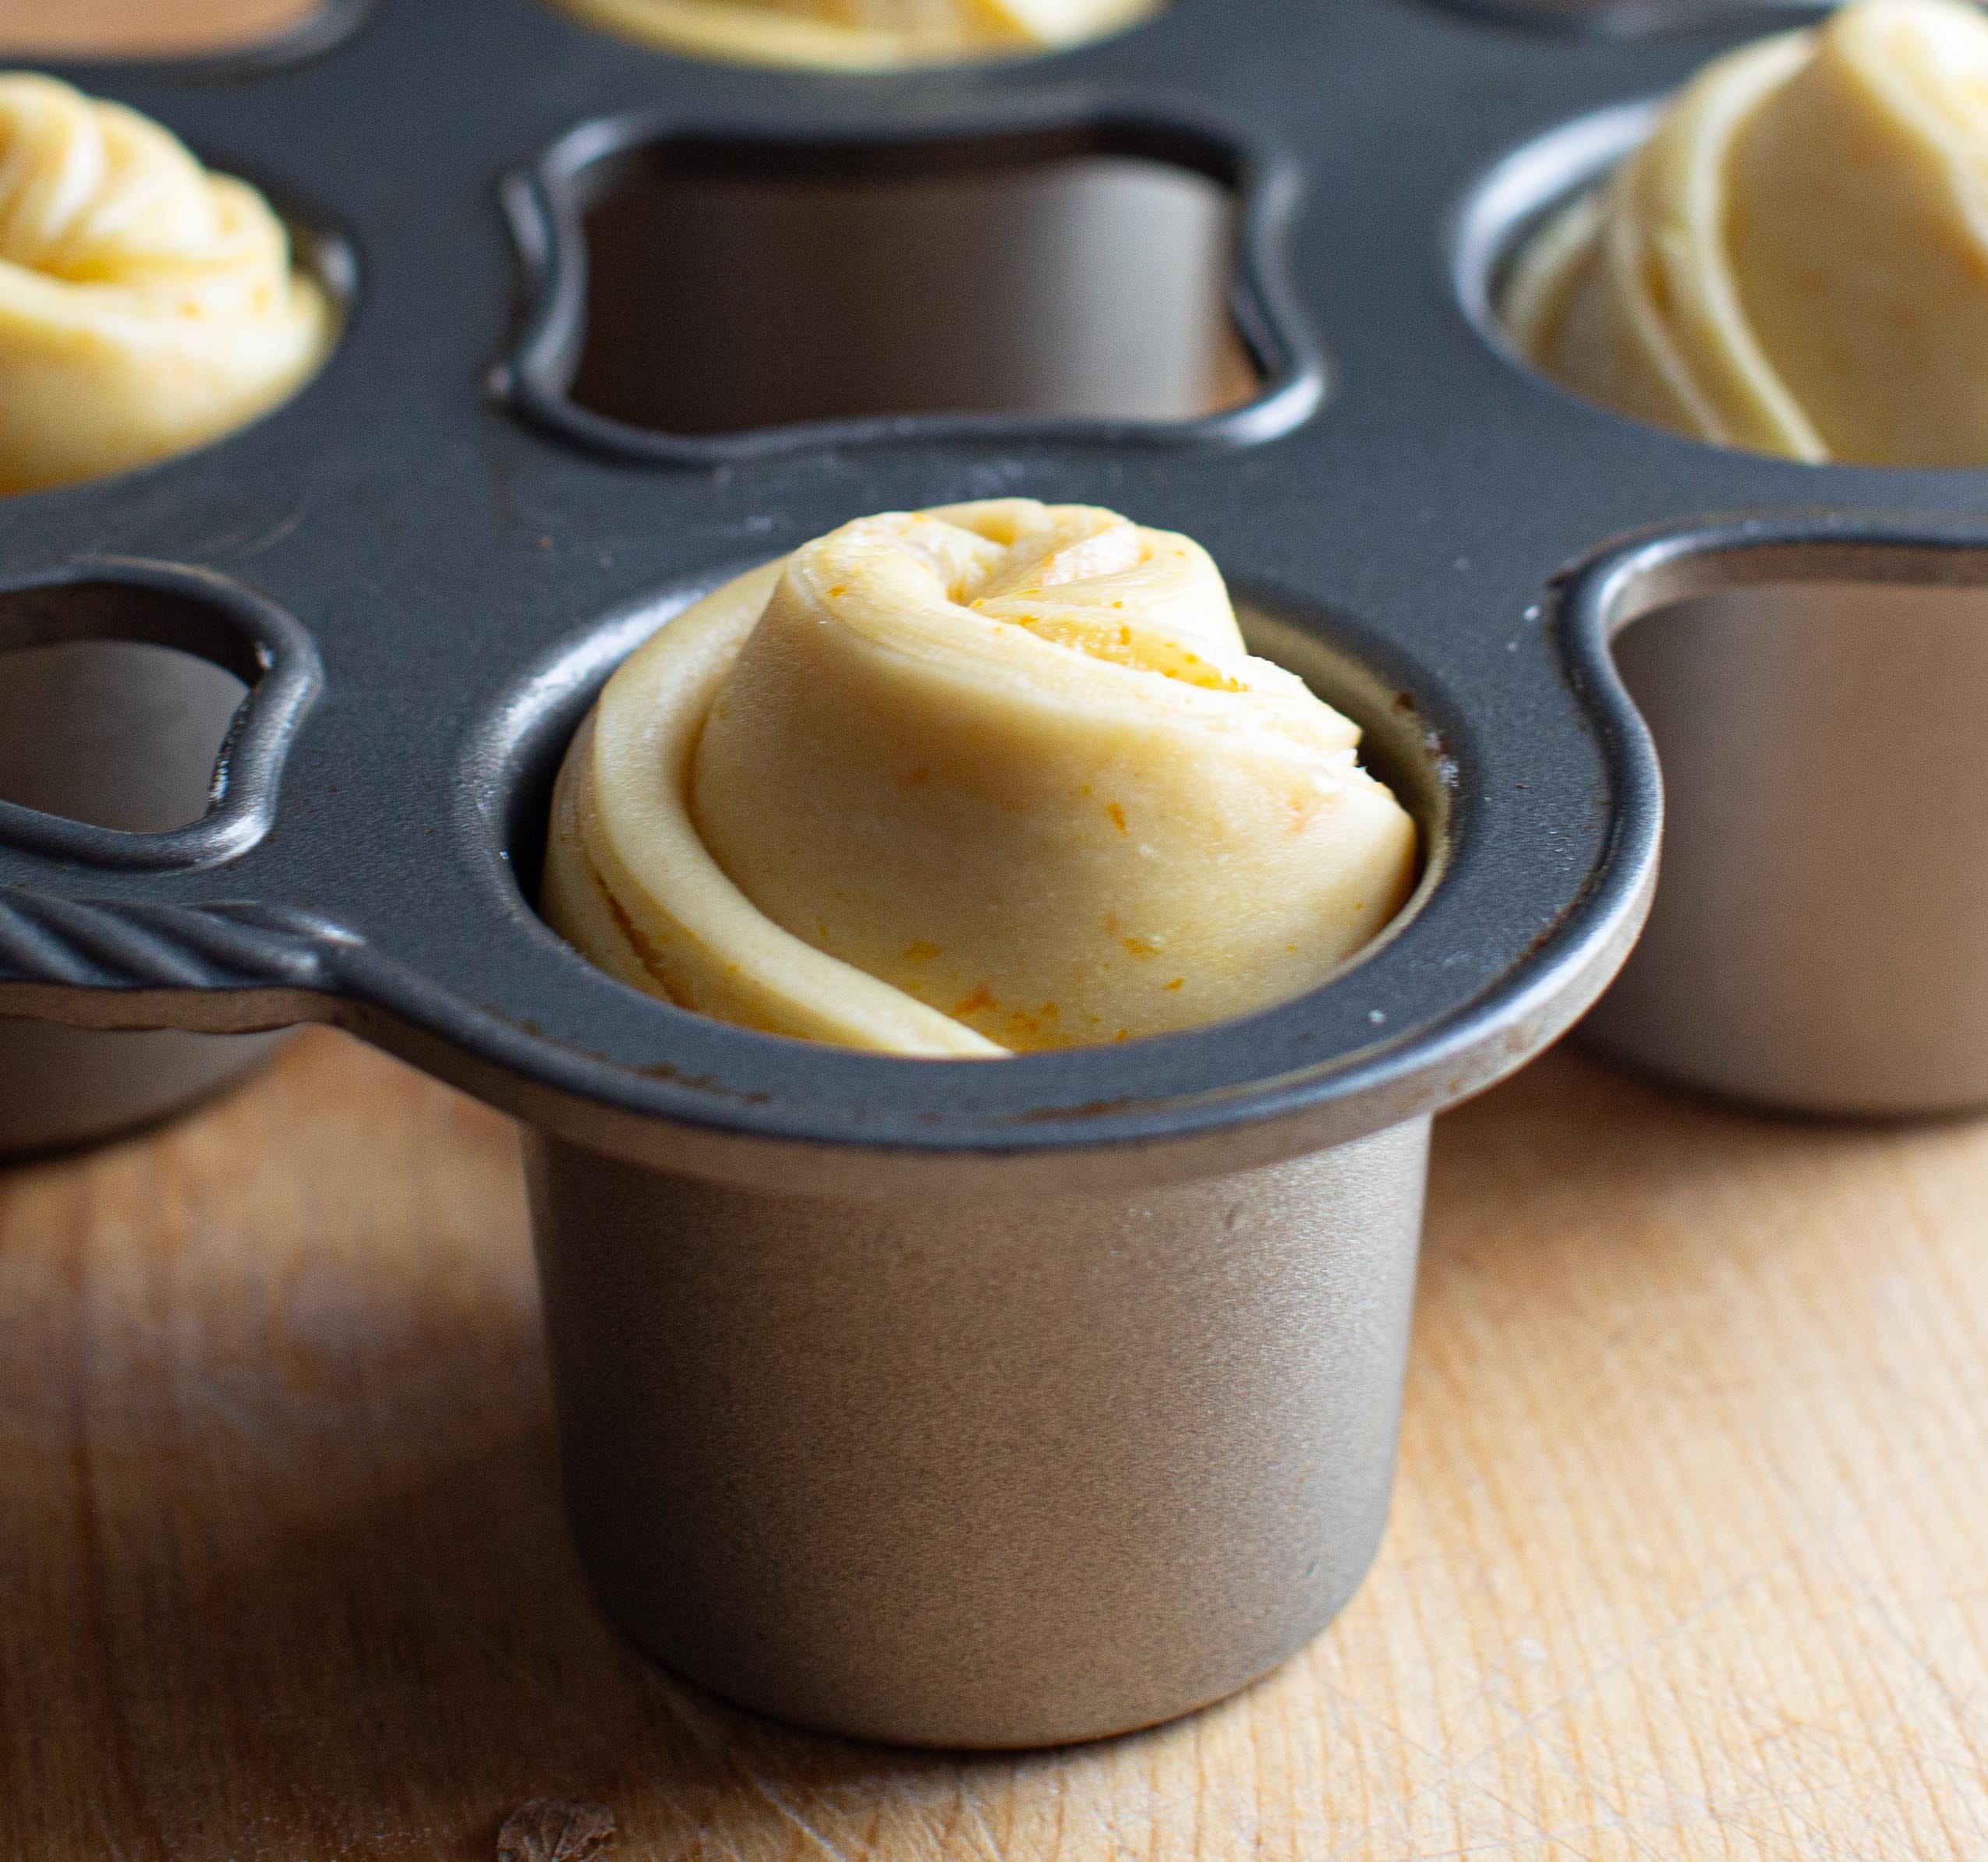
Brush to remove any flour then stack them in pairs, one atop the other, offsetting them by 1.5”. Beginning with the single portion of dough, roll the pieces up, spiraling each piece down the side as you approach the end. Tuck the ends underneath the dough piece and press firmly to seal. (The amazing Jimmy Griffin has a vertical video of how to shape using three pieces of dough. If you want to see the method, here’s the link, just note that I am only using two strips of dough, otherwise the method applies.)
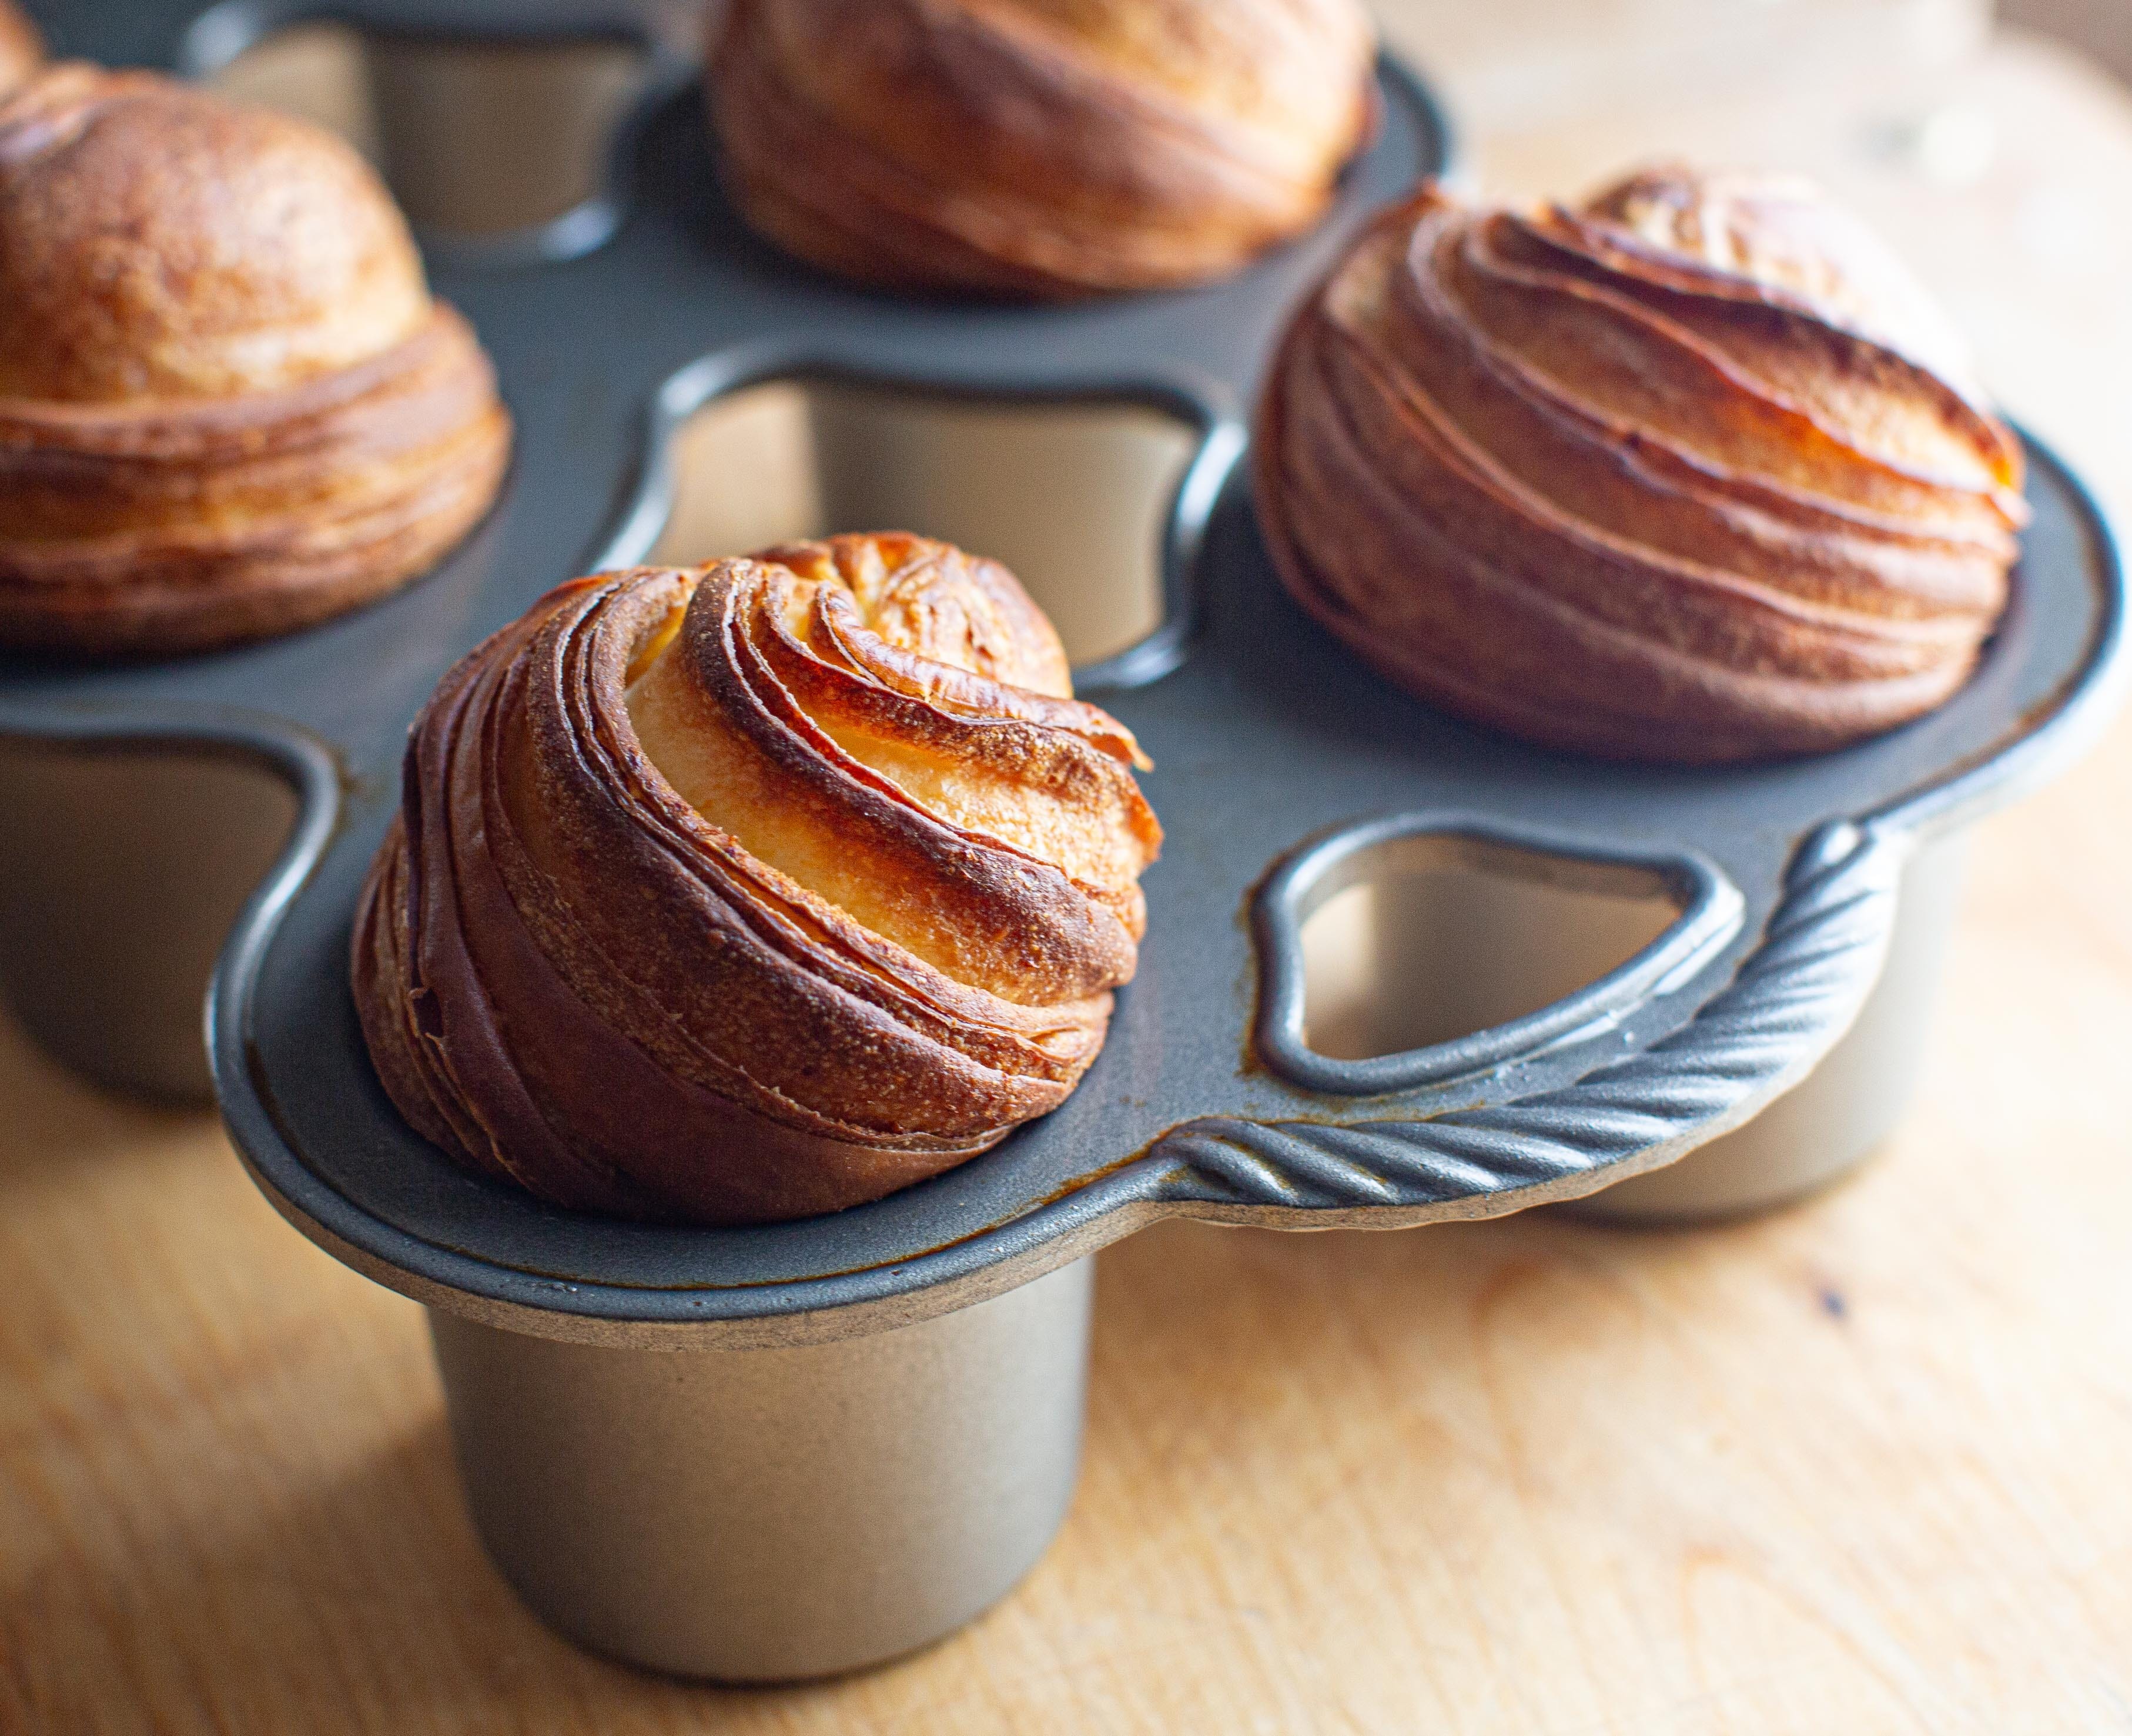
Place in prepared popover pans (I’m using the NordicWare pan with cavities measuring 2.5” deep by 2.5” wide), with the pretty side up, then, moisten or flour a single finger and poke all the way to the bottom of the mold. Cover, and proof in a warm, humid spot, until the rising dough crests the top of the pan by 1/2 to 3/4” (from the top of the pan to the highest point of the pastry). Sadly, in the coldest part of winter here in Vermont (-14°F this morning), this takes 3 to 4 hours. As always with delicate pastries, a warm (85°F maximum) proof with some ambient moisture will produce better layers.
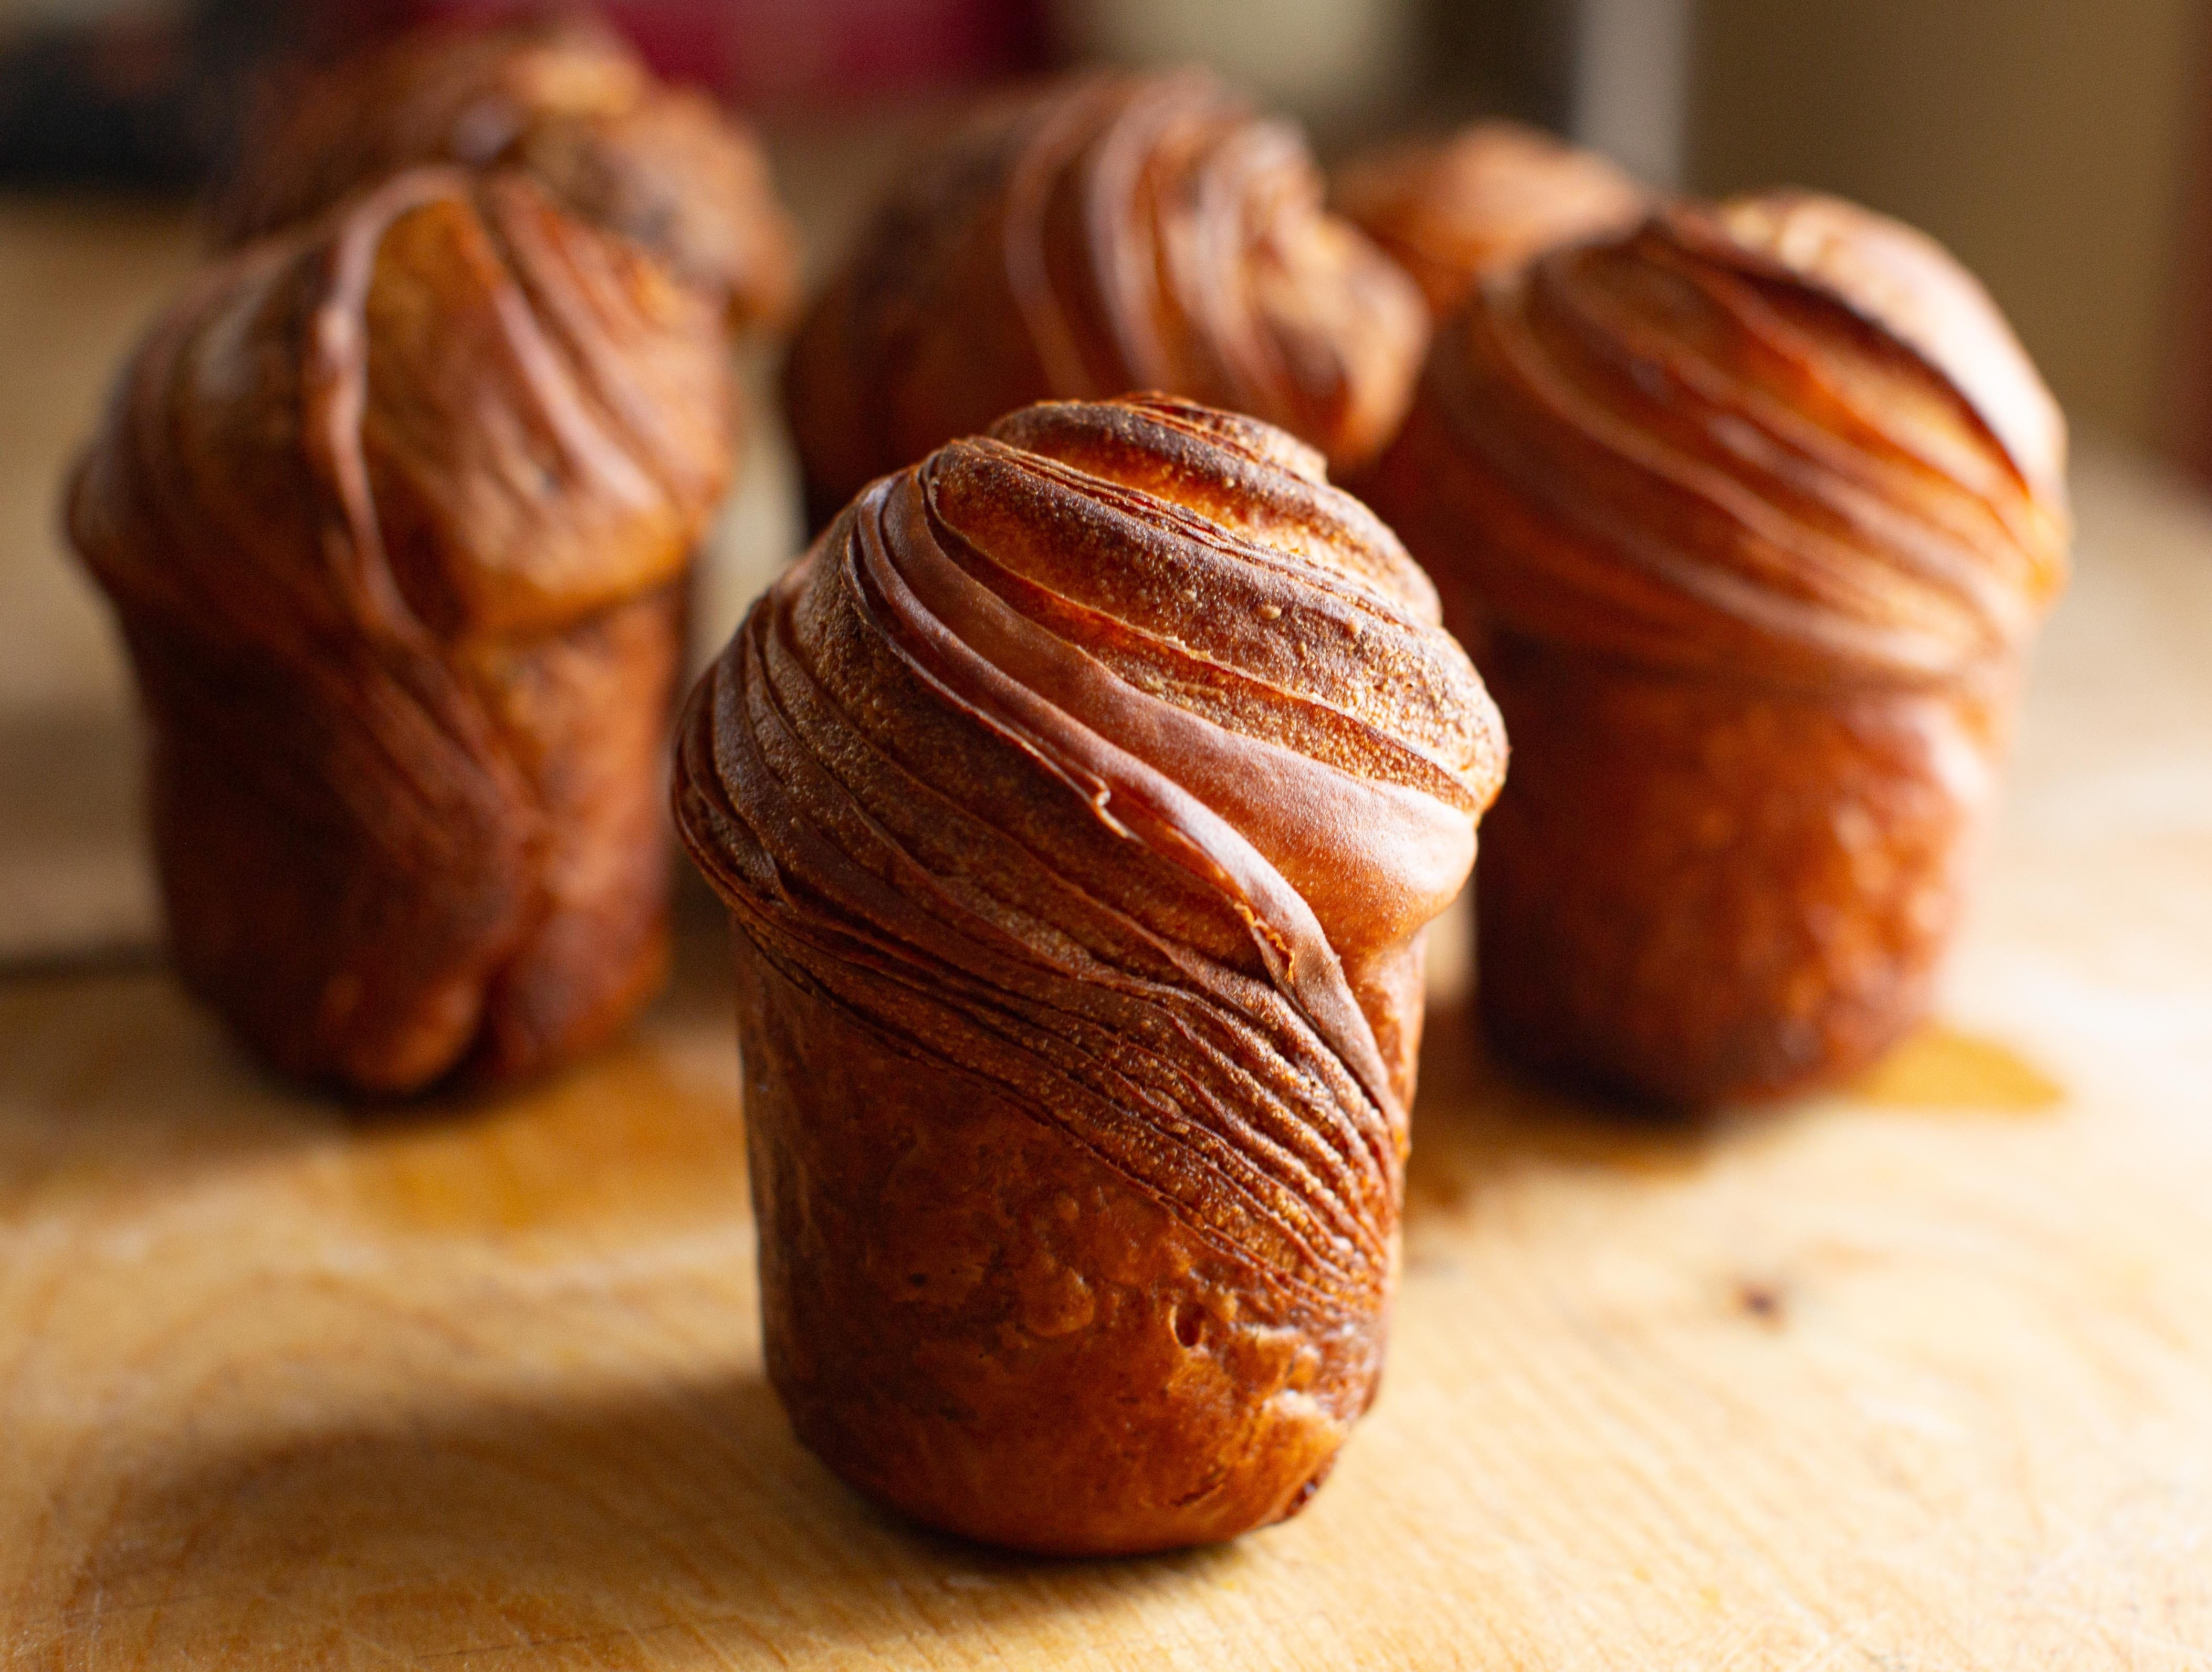
Towards the end of proofing, preheat the oven to 375°F normal bake or 350°F convection. Bake until deep golden brown, 20 to 25 minutes, rotating as necessary. The cruffins should not only have deep golden tops, the side walls should also bake to full color. See my pictures for reference.
After baking, cool briefly then remove from the pans and place on a cooling rack.
To fill and finish.
For fillings you can follow whatever fancy you have. Whipped chocolate ganache with additional whipped cream, banana pudding with toasted meringue on top, strawberry preserves and whipped cream—as with the suprêmes, options are literally endless. Have a look at the fillings piece that I wrote for some inspiration. But really, my favorite way to eat them is to remove them from the pan while still warm and toss in granulated sugar (75 grams or so), orange zest (one large orange, finely zested), and a big pinch of salt (very important!). While still warm they are crisp and buttery, and the orange sugar blooms on the warm pastry in a way that always leave me speechless. But, I also wanted some with orange cream inside and, while a little more work, they are also special.
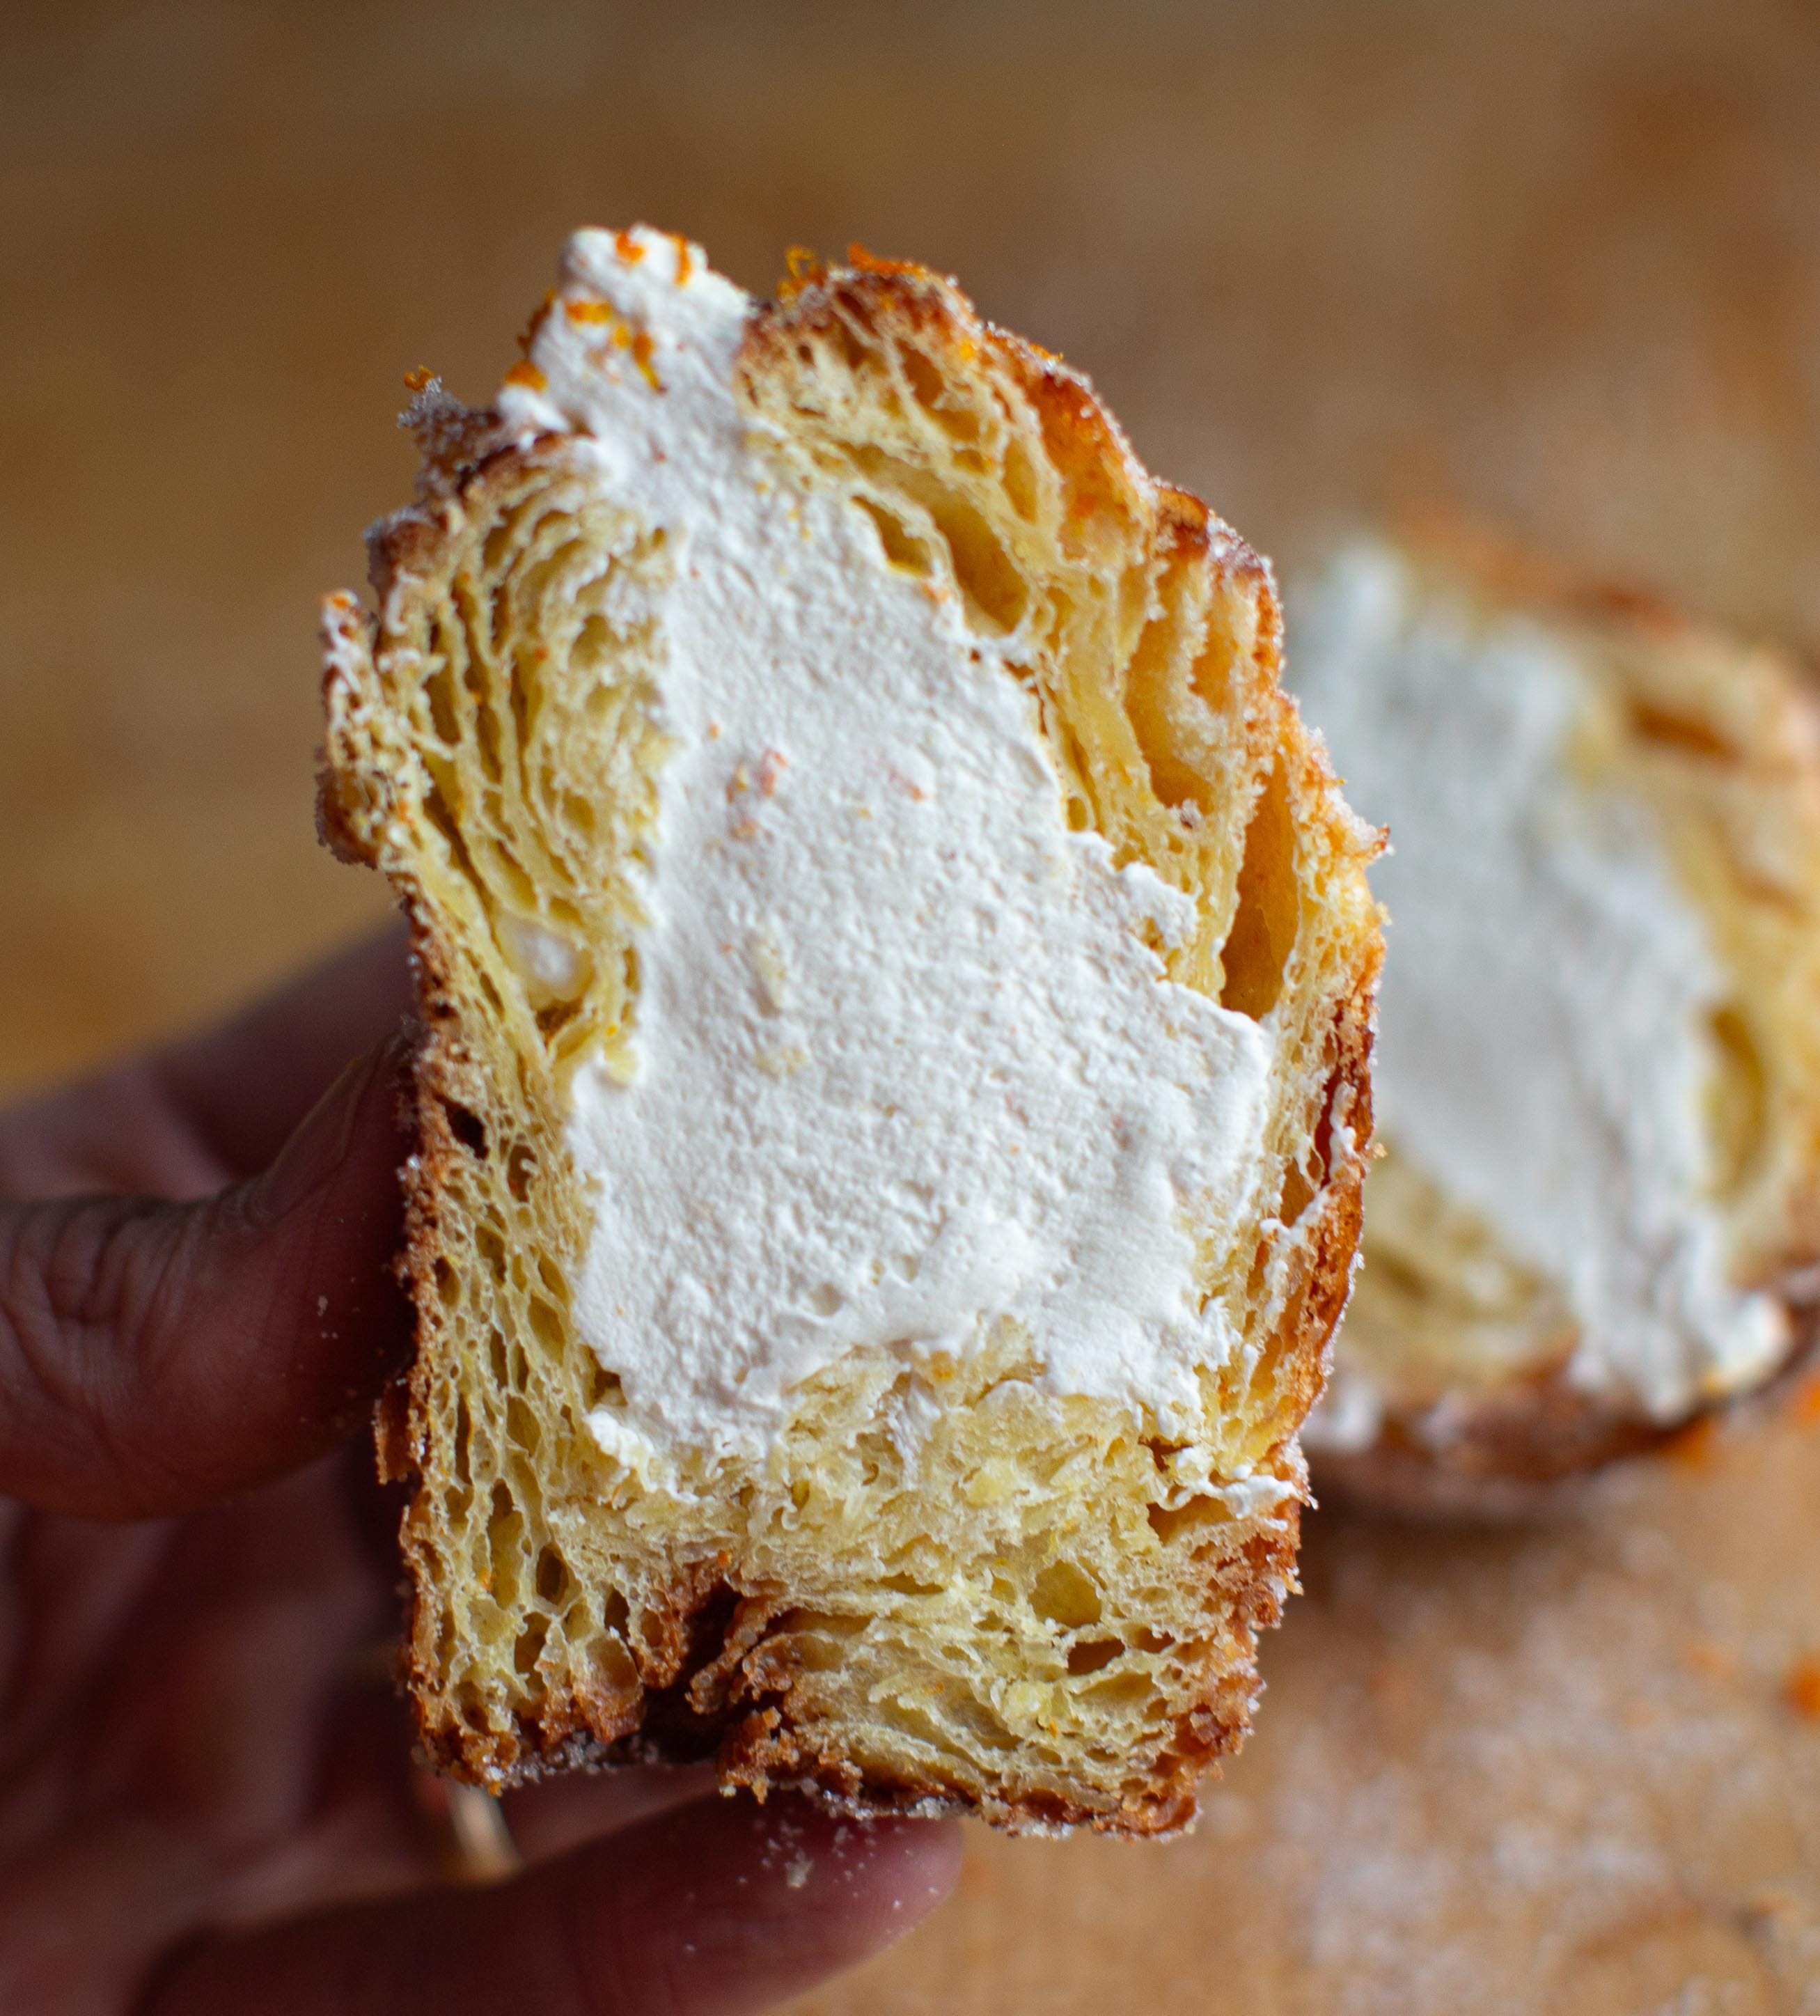
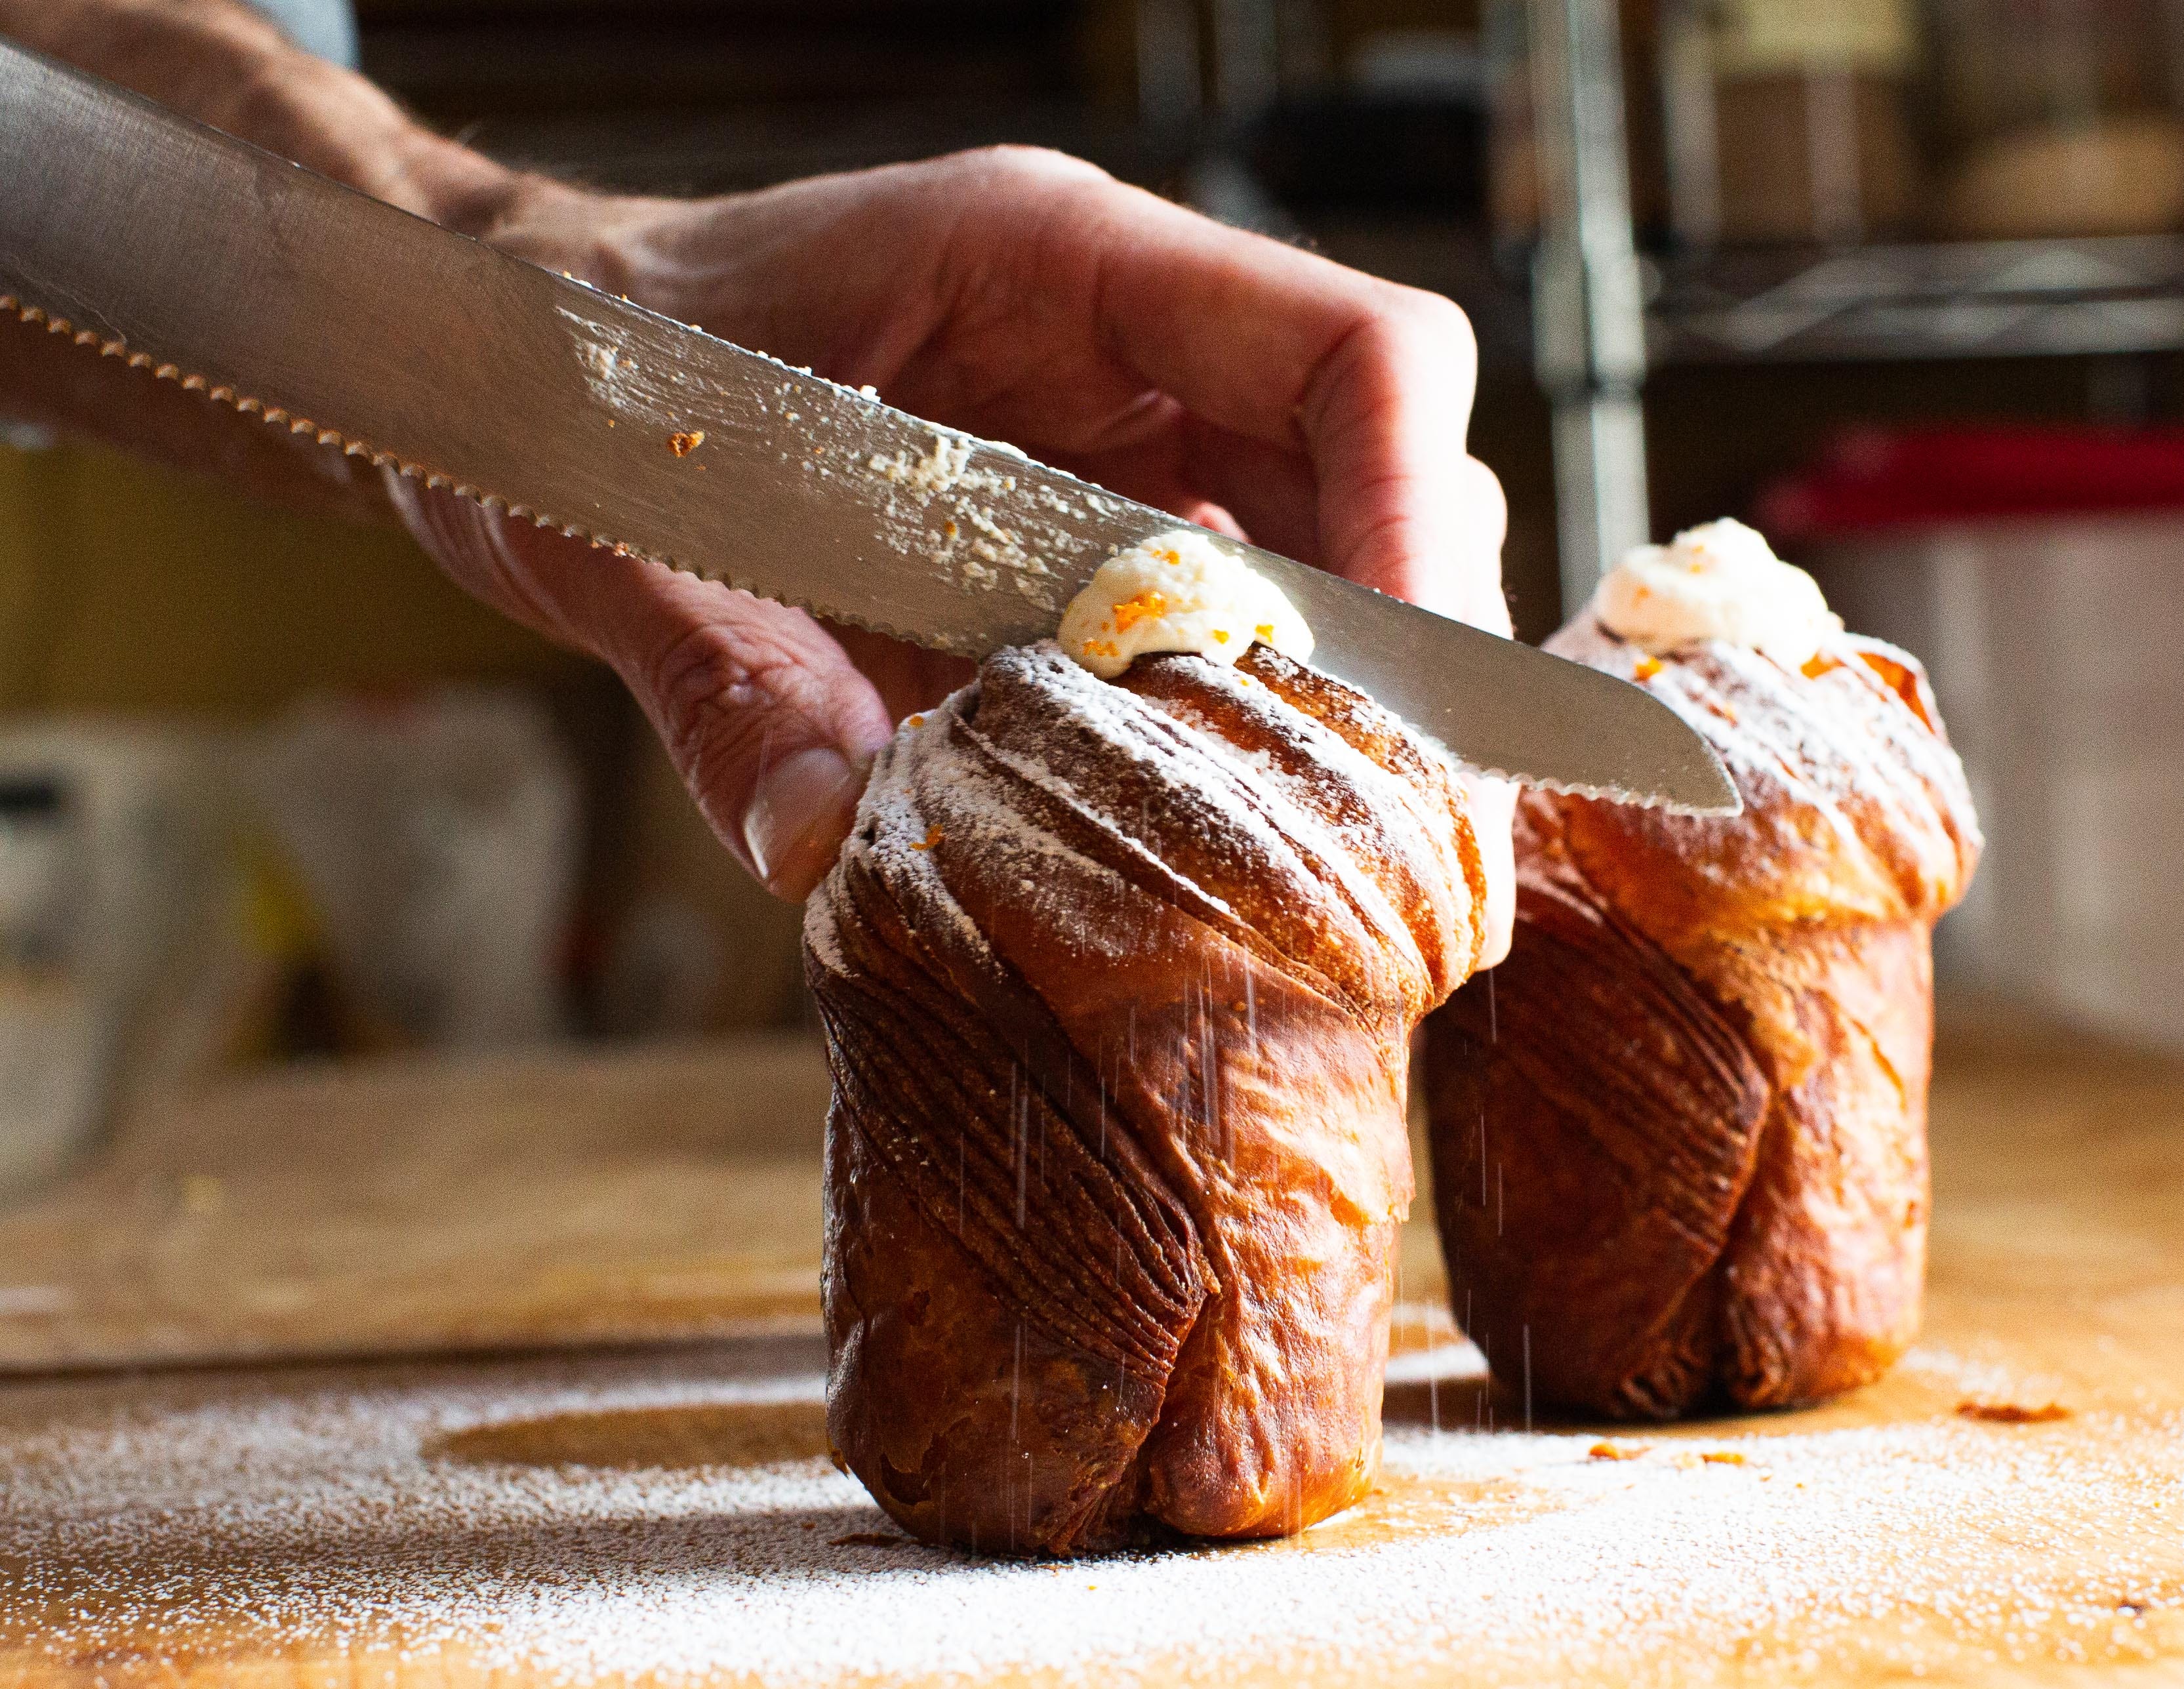
To make the creamsicle version, after baking, cool fully then fill with an orange-infused whipped cream and garnish with sugar, whipped cream, and additional orange zest.
Heavy whipping cream, 200g
Confectioners’ sugar, 30g
Orange zest, 6 to 8g (one large navel orange)
Stir together the whipping cream and confectioners’ sugar then whisk to soft peaks. Stir in the orange zest and work until semi-stiff but not grainy. Place in a pastry bag fitted with a filling tip and reserve cold until use.
To fill, using a chopstick or similar tool, poke a hole in the cruffin (top or bottom, your choice) and work to create an internal cavity to receive the cream. Make a bigger cavity than you think you’ll need.
Best practice for filling the cruffins is to place each pastry on a scale, tare, and then fill to a desired weight, 25g or so. After filling I garnish with some of the cream as well as additional zest then dust with confectioners’ sugar.
Thanks for reading.
Happy baking,
Martin
Rolling summary:
After fermentation, roll the dough to 9” by 15”. Chill.
After the chill, roll to 10” by 18”. Add the butter and zest and close the dough (dough package will be 9” by 10”).
Roll to 9.5” by 20”. Perform a letter fold. Dough package will be 7” by 9.5” after the fold.
Roll to 10” by 22”. Perform a second letter fold. After the letter the package will measure 7.5” by 10”.
Roll to 11” by 11”. Chill until firm but pliable, 10 to 20 minutes.
Roll to 12” by 12”. Cut 12 strips 2” wide and 6” long.
Made these today for my wife's birthday. She LOVED them despite the fact that mine weren't quite as beautiful as Martin's. My first time laminating dough - not simple, but the instructions were easy to follow. Admittedly, I need to practice more, but I am ready to try it again!
Hello Martin, I can't wait to make these with a pistachio filling! How much yeast should I be using or reducing by if I want to do an overnight rise in the fridge for the brioche dough?